Ditching Rekor for AWS Signer - A Simpler Way to Sign Container Images
Look, I get it. Everyone is using Cosign and Rekor for container signing these days. I've used it myself (check out my previous post if you're curious). But when you're working on private projects, using Sigstore's public Rekor instance isn't really an option.
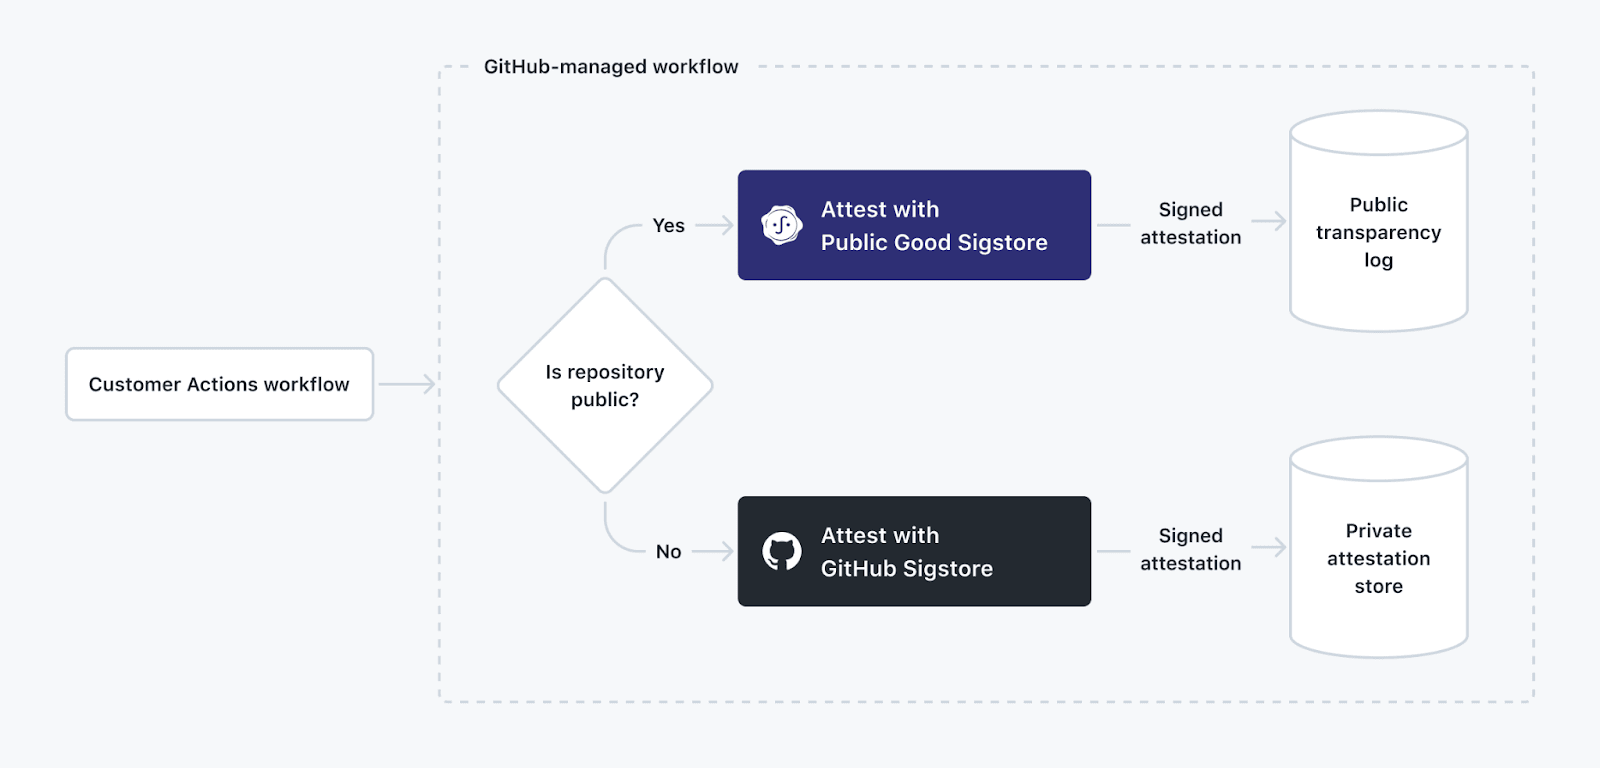
The Private Rekor Headache
Sure, you could set up your own private Rekor instance. But let's be real - that means:
- You're now on the hook for keeping it running 24/7
- And heaven forbid it goes down during a deployment...

Credit: GitHub Blog
I recently came across this great post by Jack where he talks about how simplicity is preferable. And you know what? He's absolutely right. Why maintain a whole separate service when there's a simpler way?
That's when I started looking into AWS Signer and Notation. (If you're on Azure, you can do something similar with Azure Vault and Notary, but that's a story for another day).
Prerequisite
Before we dive in, make sure you've got:
- GitHub Actions set up in your repository
- An AWS account with ECR access
- A Dockerfile for the container image ready to go
Here's the GitHub Action workflow I put together. It's pretty straightforward - we build the image, sign it, and make sure the signature is valid:
name: Build and Sign Container Image

on:
  push:
    branches:
      - main

jobs:
  build:
    runs-on: ubuntu-latest

    steps:
      - name: Checkout code
        uses: actions/checkout@v2

      - name: Configure AWS credentials
        uses: aws-actions/configure-aws-credentials@v4

      - name: Login to Amazon ECR
        uses: aws-actions/amazon-ecr-login@v2

      - name: Set up Docker Buildx
        uses: docker/setup-buildx-action@v1

      - name: Build container image
        id: build
        run: |
          docker buildx build \
            --platform linux/amd64 \
            --file Dockerfile \
            --tag my-image:latest .

      - name: Get image SHA
        id: digestval
        run: echo "::set-output name=image_sha::$(docker inspect --format='{{index .RepoDigests 0}}' my-image)"

  sign-and-validate:
    needs: build
    runs-on: ubuntu-latest

    steps:
      - name: Setup Notation CLI
        uses: notaryproject/notation-action/setup@v1
        with:
          version: 1.0.0

      # This part's important - it creates your signing profile if it doesn't exist
      - name: Configure AWS Signer Profile
        run: |
          PROFILE_NAME="supplychain_signing_profile"
          SIGNING_PLATFORM_ID="Notation-OCI-SHA384-ECDSA"

          if ! aws signer list-signing-profiles --query "profiles[?profileName=='${PROFILE_NAME}']" --output text | grep -q ${PROFILE_NAME}; then
            echo "Creating new signing profile ${PROFILE_NAME}"
            aws signer put-signing-profile --profile-name ${PROFILE_NAME} --platform-id ${PLATFORM_ID}
          else
            echo "Using existing profile ${PROFILE_NAME}"
          fi

      - name: Install AWS Signer Notation Plugin
        run: |
          wget https://d2hvyiie56hcat.cloudfront.net/linux/amd64/installer/deb/latest/aws-signer-notation-cli_amd64.deb
          sudo dpkg -i aws-signer-notation-cli_amd64.deb
        shell: bash

      # Here's where the magic happens
      - name: Sign Container Image
        if: steps.build.outputs.image_sha
        run: |
          notation sign ${{ steps.digestval.outputs.image_sha }} \
            --plugin "com.amazonaws.signer.notation.plugin" \
            --id "arn:aws:signer:YOUR_AWS_REGION:YOUR_AWS_ACCOUNT_ID:/signing-profiles/supplychain_signing_profile"
        shell: bash

      # Always verify your signatures!
      - name: Verify Image Signature
        run: |
          echo "${{ secrets.aws_signer_trust_policy }}" | base64 -d > $GITHUB_WORKSPACE/$ECR_REPOSITORY/signerpolicy.json
          notation policy import $GITHUB_WORKSPACE/$ECR_REPOSITORY/signerpolicy.json --force
          notation verify ${{ steps.digestval.outputs.image_sha }}
        shell: bash
A Few Quick Tips
If you're implementing this in your own pipeline:
- Keep your AWS credentials in GitHub Secrets (seriously, don't commit them)
- Use the minimum IAM permissions needed
- Actually verify those signatures before deploying (I've seen people skip this...)
Wrapping Up
Look, at the end of the day, this approach isn't as fancy as running your own Rekor instance. But it works, it's reliable, and most importantly - it's one less thing to maintain. Sometimes boring is better!
_Quick note: The workflow above assumes you're using Amazon ECR. If you're using a different registry, you'll need to adjust the login steps accordingly, Also the above implementation works for container built in amd64 arch, if you use ARM instance, you eill have to replace thr plugin and other things with the ARM equivalent
