Setting Up Ubuntu Linux VPS For Offensive Security and Pentesting

Having your Linux environment set, is also one of the essentials to getting your assignments done in any pentesting, security class or day to day work.
From where i am coming from, have got access to computer with little RAM and CPU to hold the heavy things I will be putting on the virtual box alongside Kali Linux.
Well I got it installed because I had no options of accessing a Linux environment back then when I started out.
So my computer became so slow 😂, It takes so much time to load up Kali, even after opening it up, I have to click on terminal and chill before it will pop up, I will say it wasn't so easy.
Upon discovering I could set up a running Ubuntu OS in VPS, that's when i stopped using Kali Linux, this doesn't mean Kali Linux isn't good.
So today i will be guiding you on how to set up your own Ubuntu OS on VPS for Pentesting activities and Offensive Security.
Let's jump into it;
Creating and Setting up your Ubuntu Linux VPS
We have alot of VPS service providers;
- Digital Ocean
- Linode
- Microsoft Azure
- Amazon AWS
- Vultr
I use Digital Ocean though, you can signup for Digital Ocean here, You will need to add your credit card or paypal to get free $100 Digital Ocean credit) after signing up.
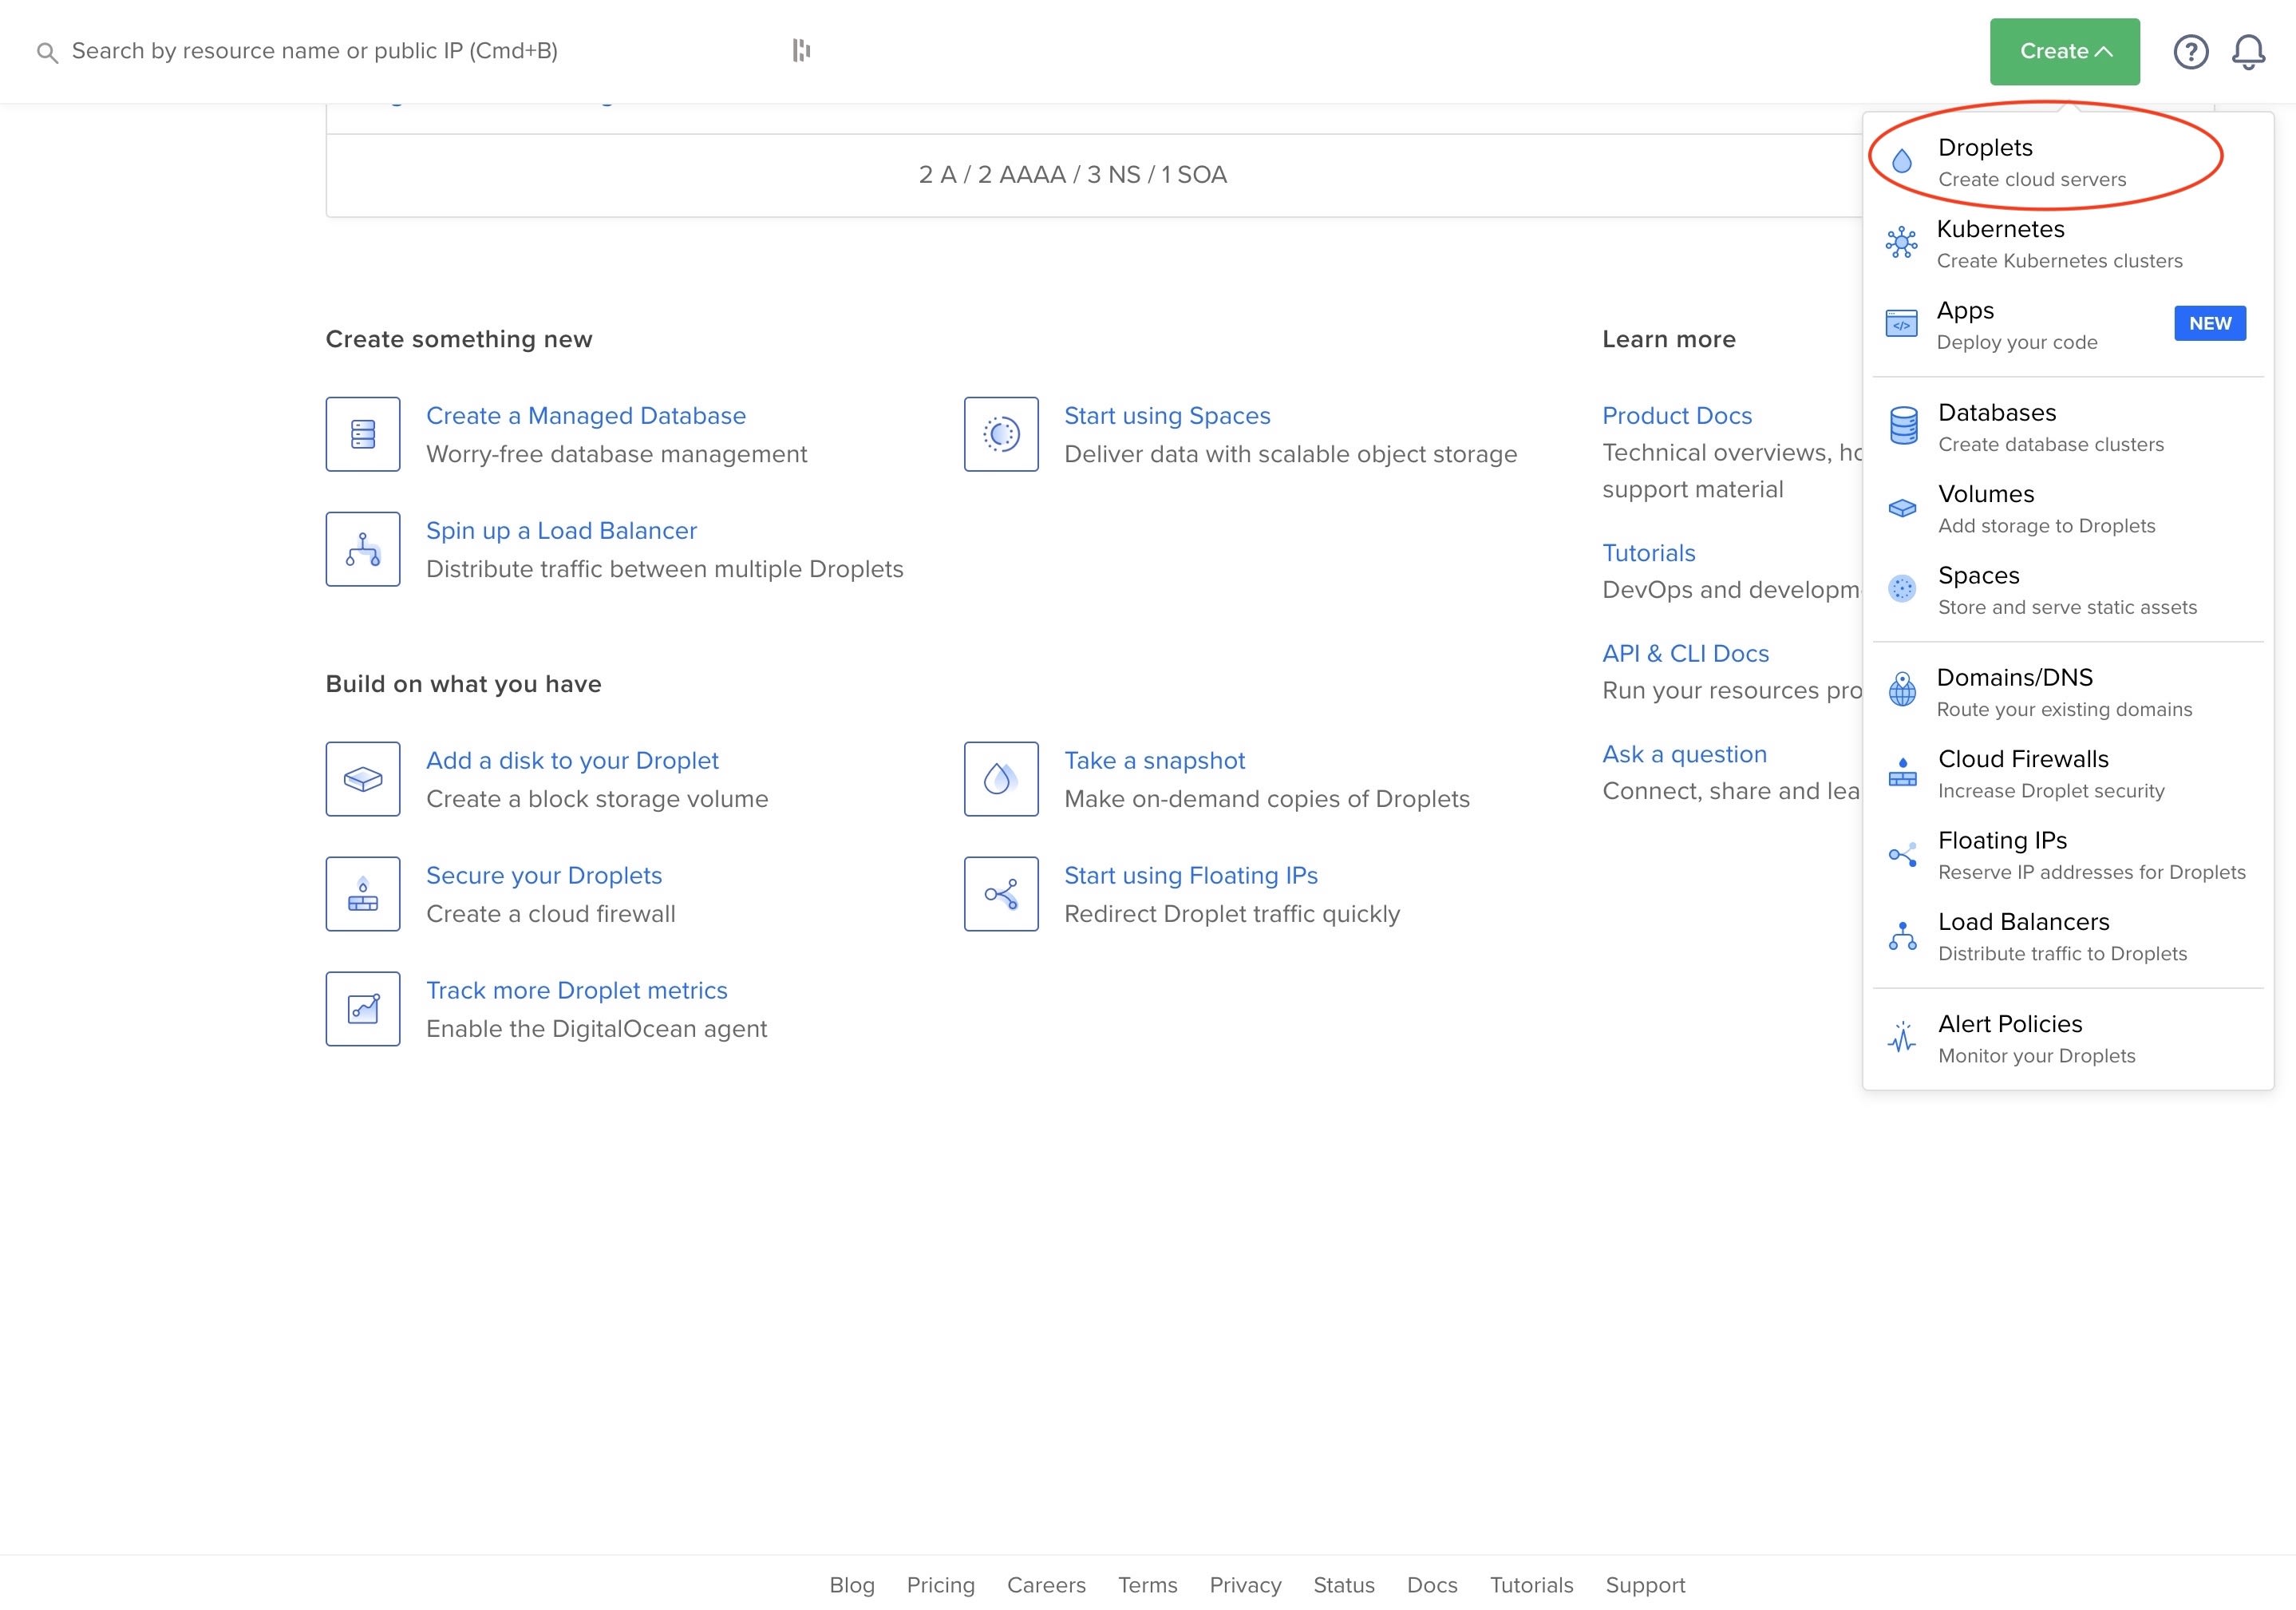
When you are done signing up, Navigate to your dashboard.
Locate the Create button at the top left hand side of your dashboard, click on it to list out things that can be created, then select Droplet
The Droplets dashboard will open up, where we would set up every thing, on the Droplets Dashboard under Choose an image you will see things Distributiions like Ubuntu, Debain, Cent OS, Fedora.
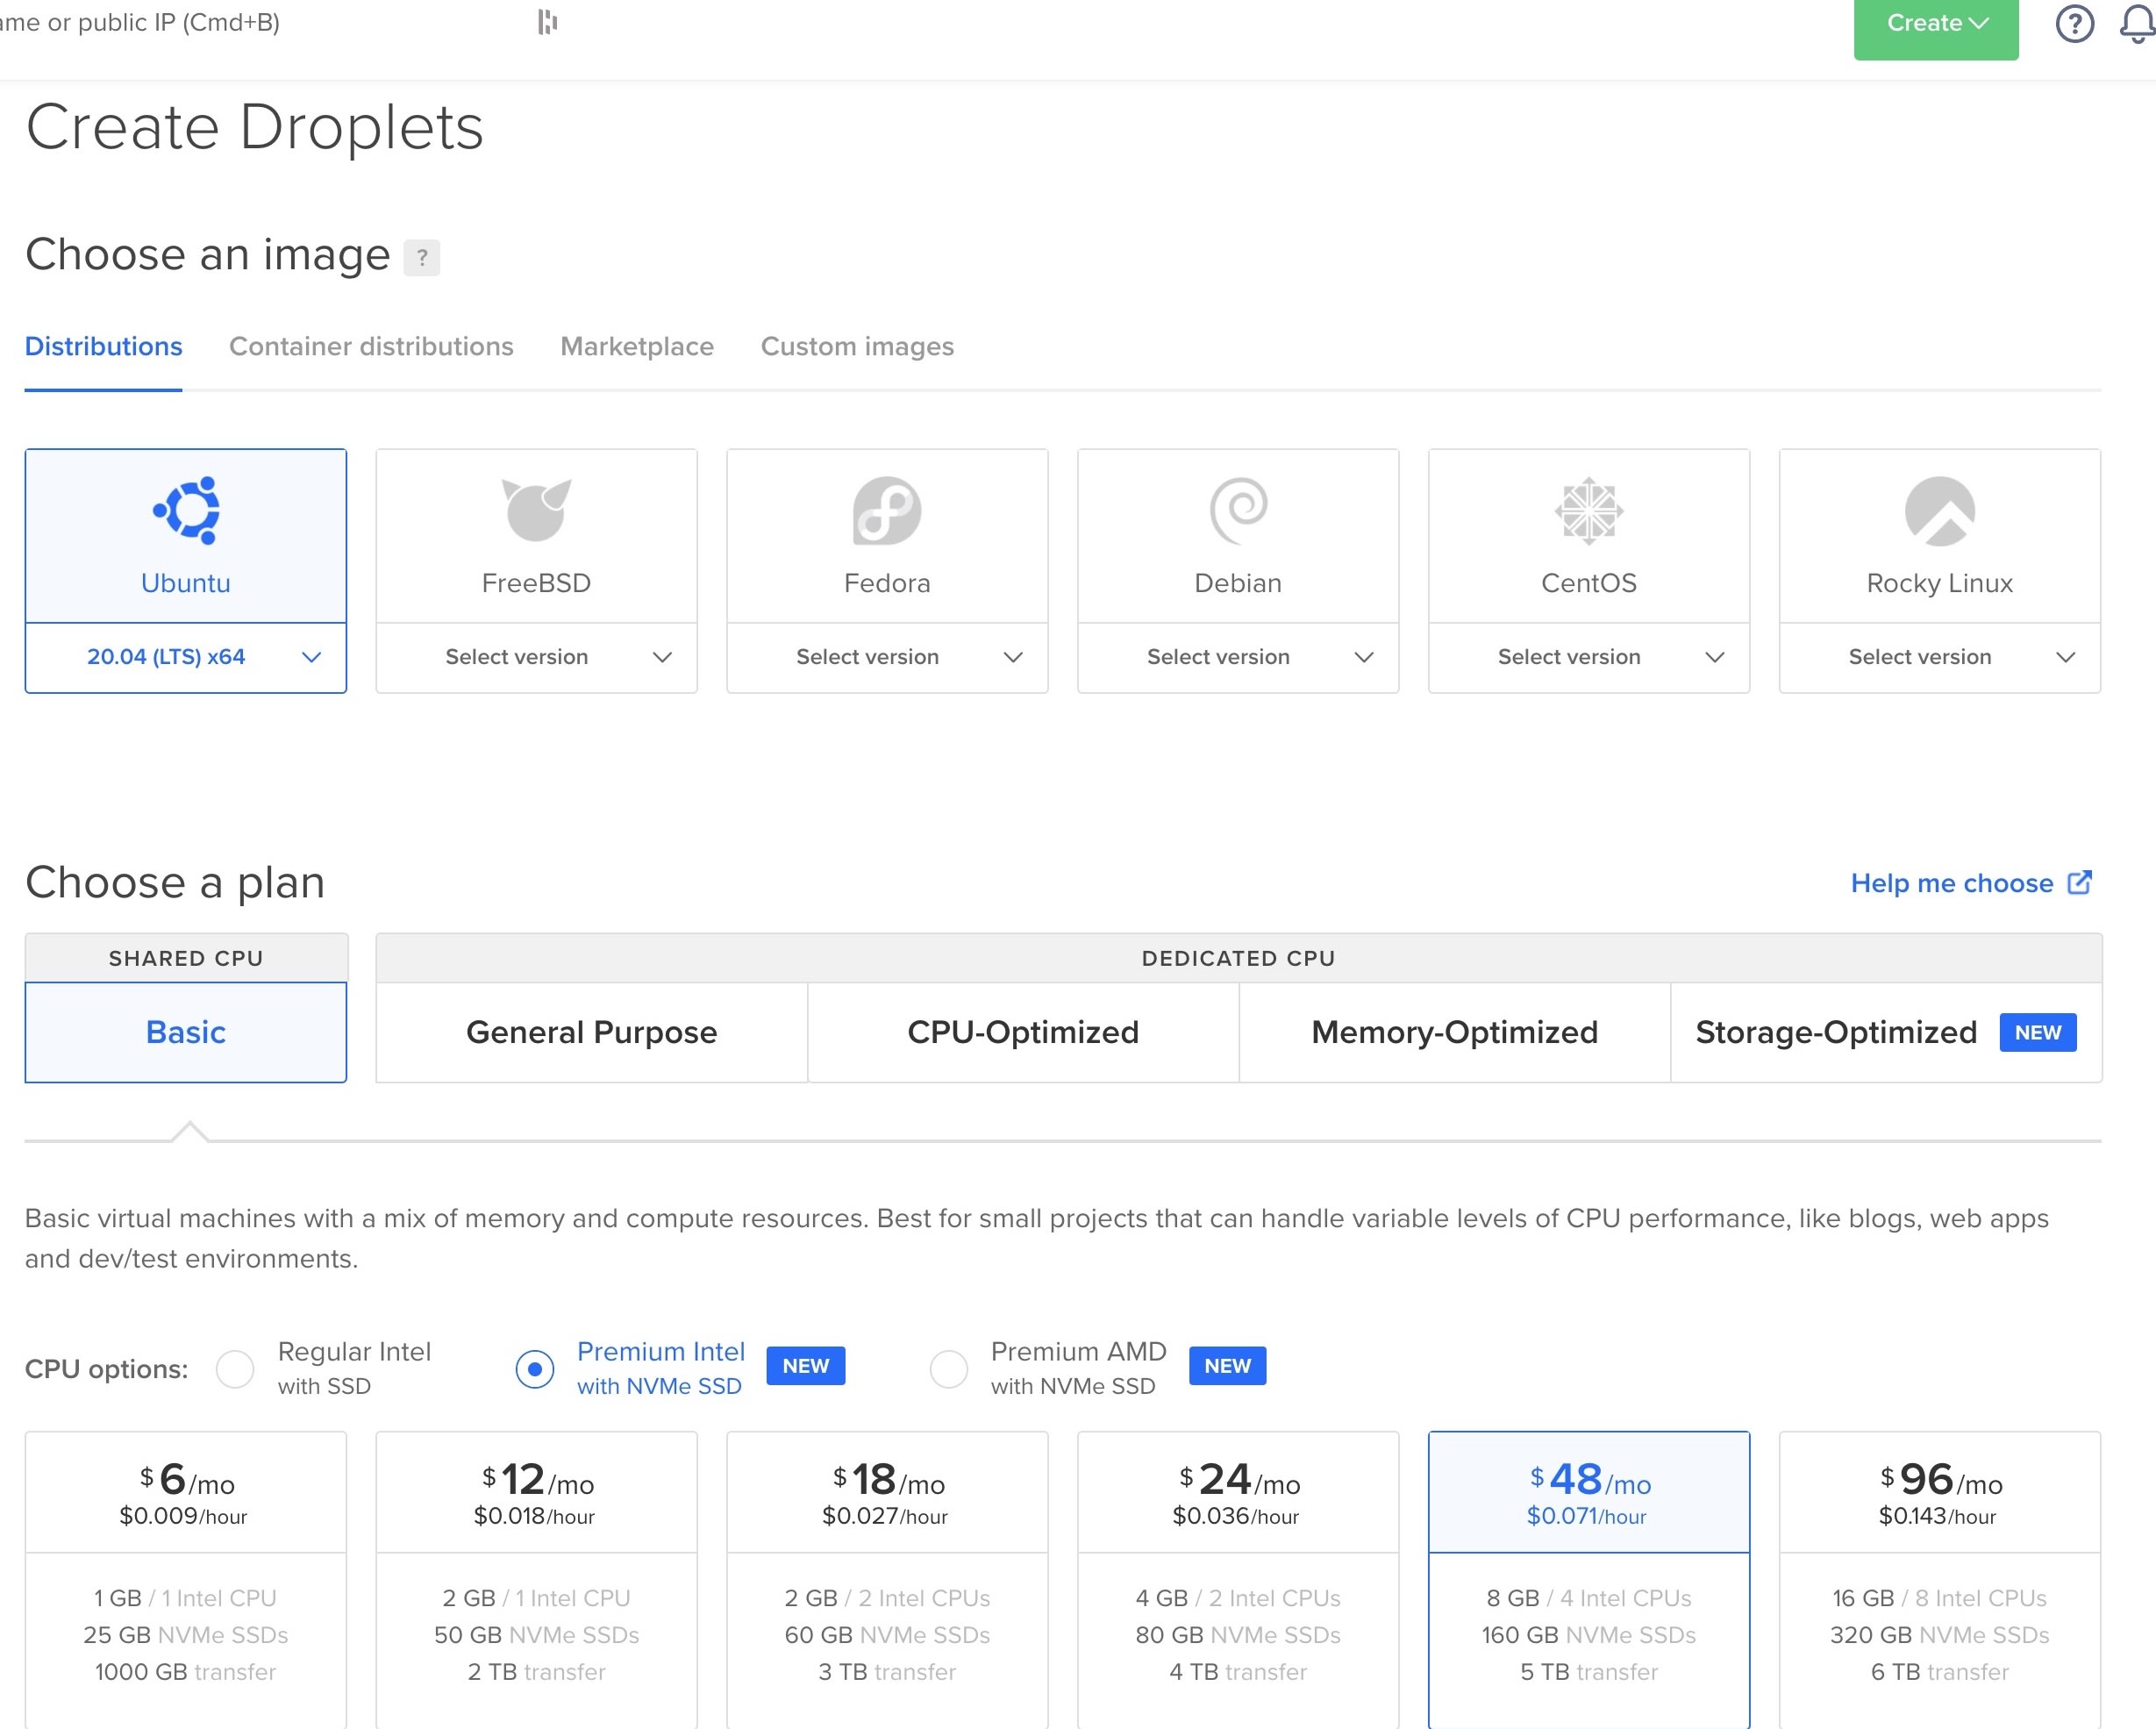
You can pick any distribution you like, but here we will be picking Ubuntu.
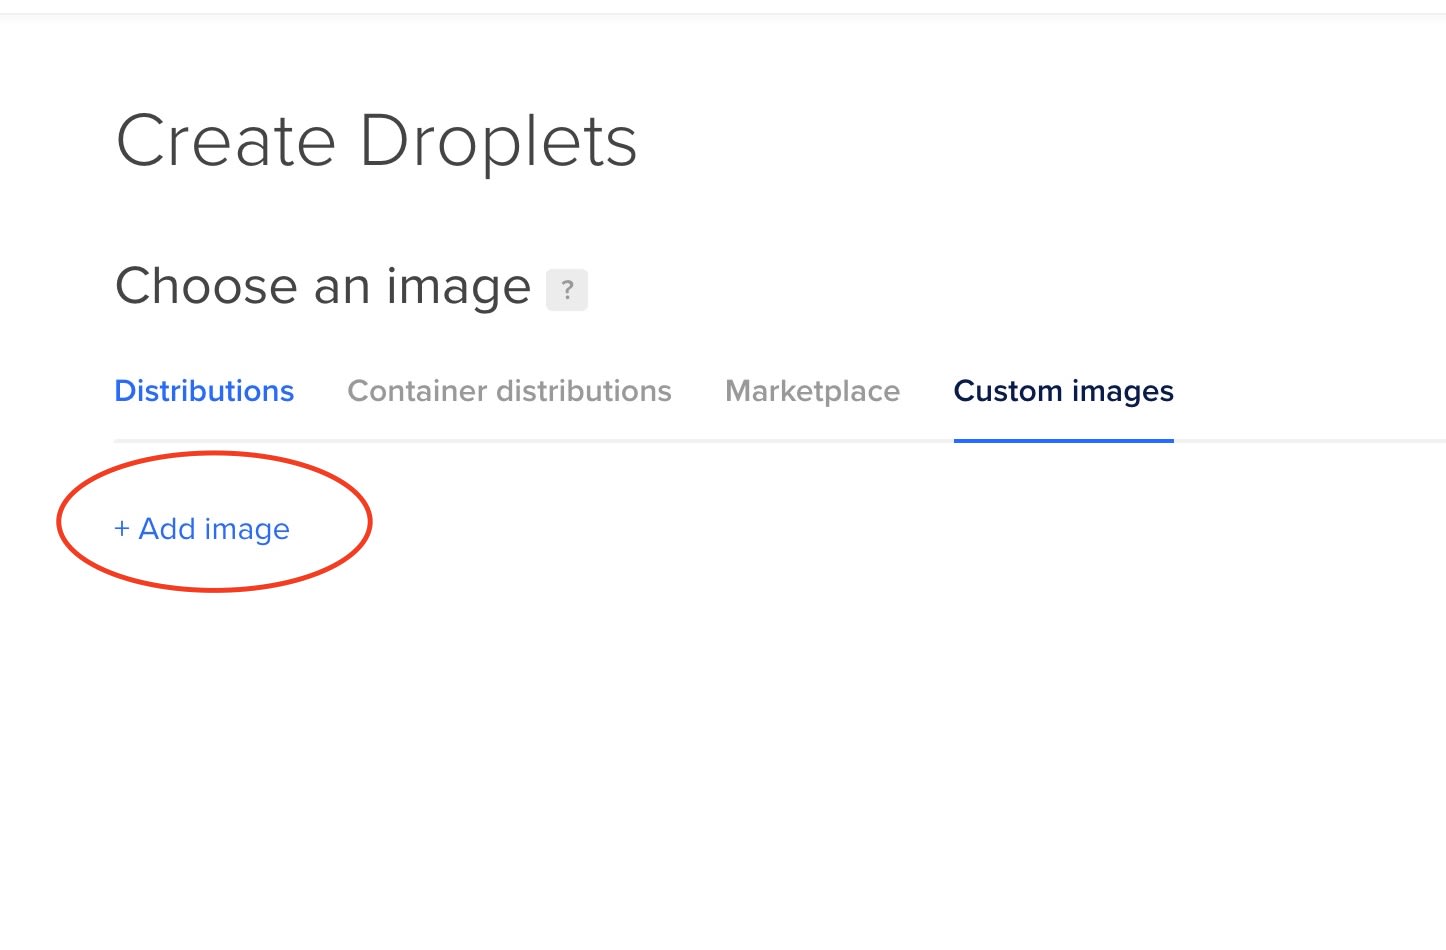
Also if you have any other Linux Distribution images you like, you can also upload them using the Custom images option under the Choose an image Settings
Back to our settings;
After choosing Ubuntu or any other Distribution you like under the Choose an image settings,
Lets proceed to the next setting Choose a plan

I will be leaving the option to Basic, under the CPU options: you can decide which CPU Option you like, but am poicking Premium Intel with NVMe SSD
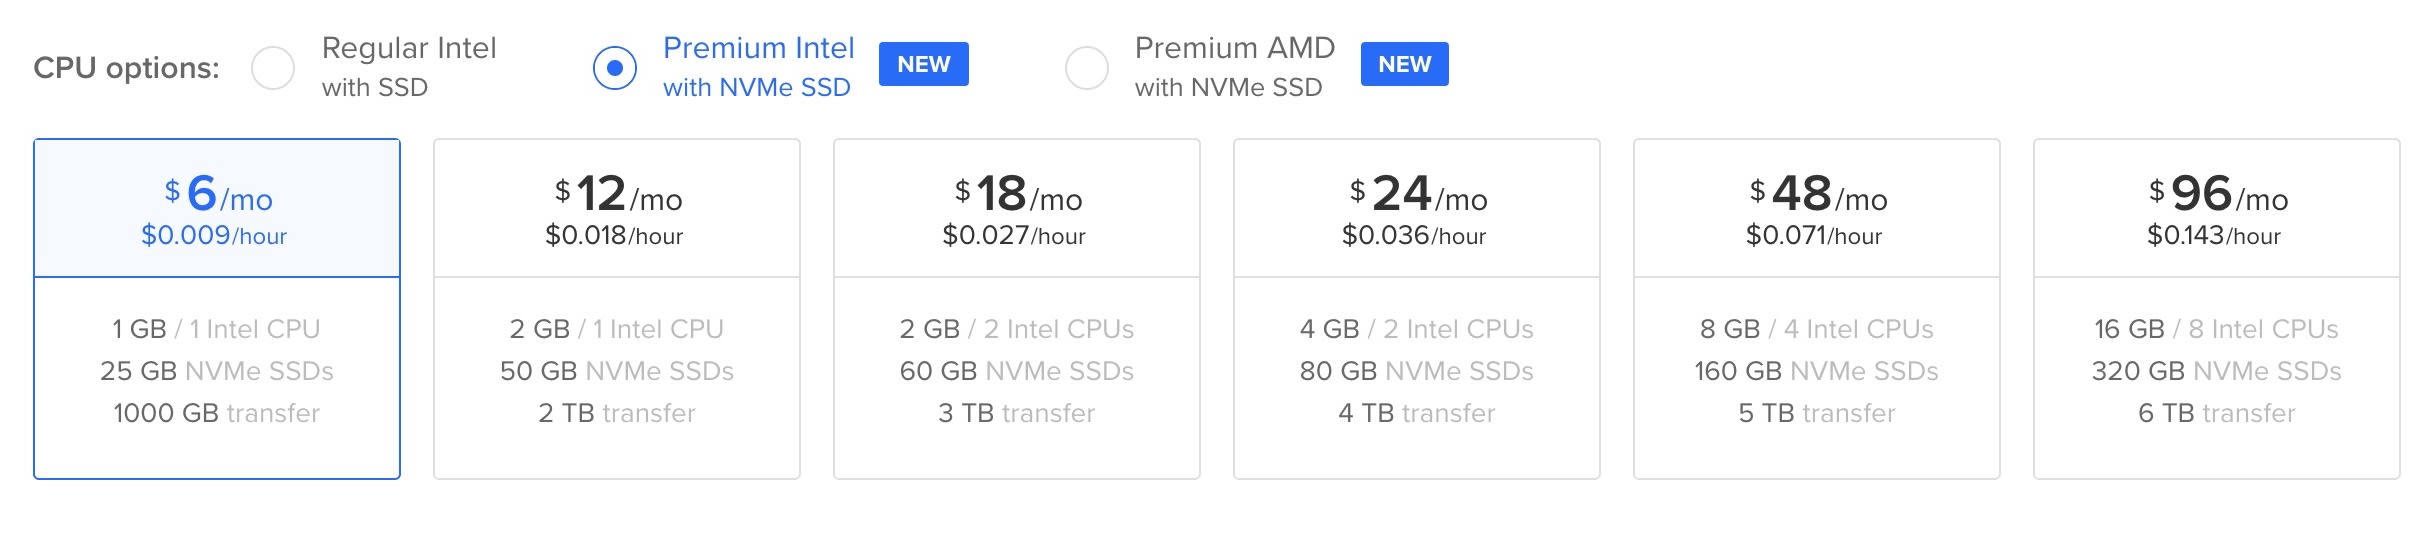
After that we will choose $6/month plan which as 1 GB / 1 Intel CPU, 25 GB NVMe SSD disk, 1000 GB transfer
The reason why am picking this option is bacause i wont be doing an heavy activities or run tools that can eat up that space i have chosen.
So you can decide to pick any plan, based on what you want, and based on the credit you have in your Digital Ocean account.
The more CPU and SSD disk space you choose the faster your environment will be.
Moving to the Add block storage
Leave this settings to default,.
For the Choose a datacenter region Settings
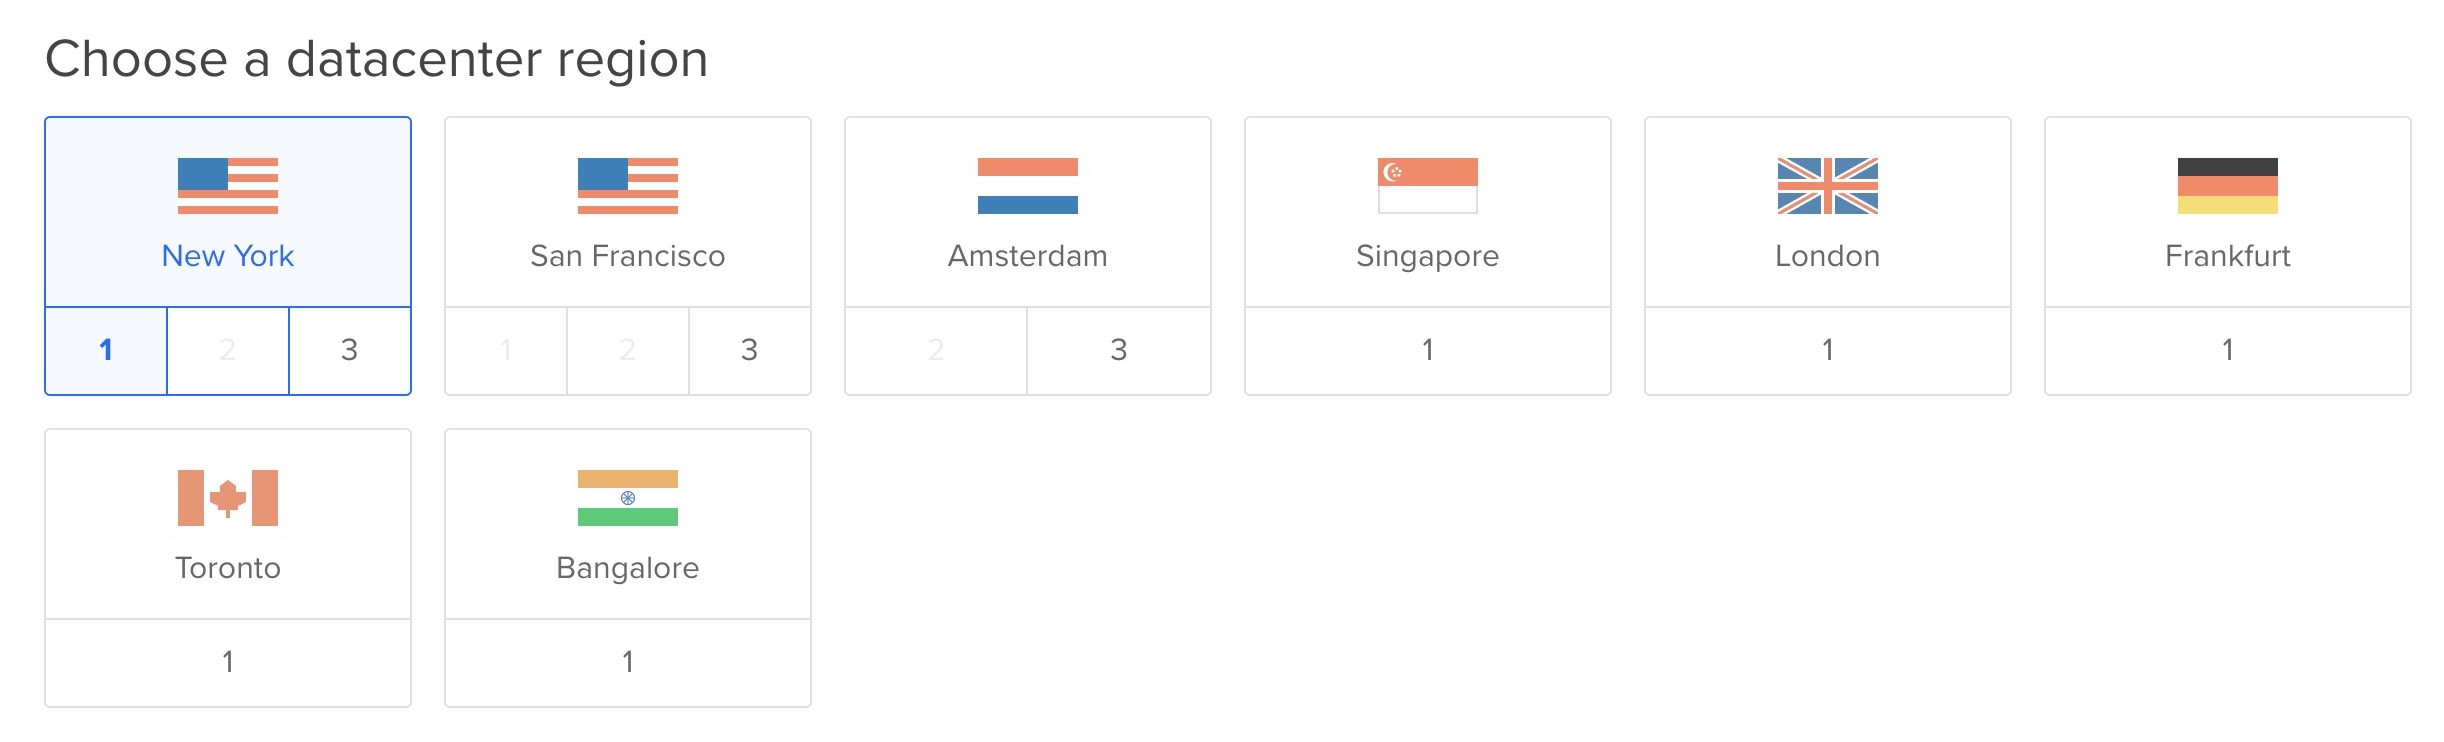
You can choose any data centre near to your location or closer to your region.
VPC Network Settings
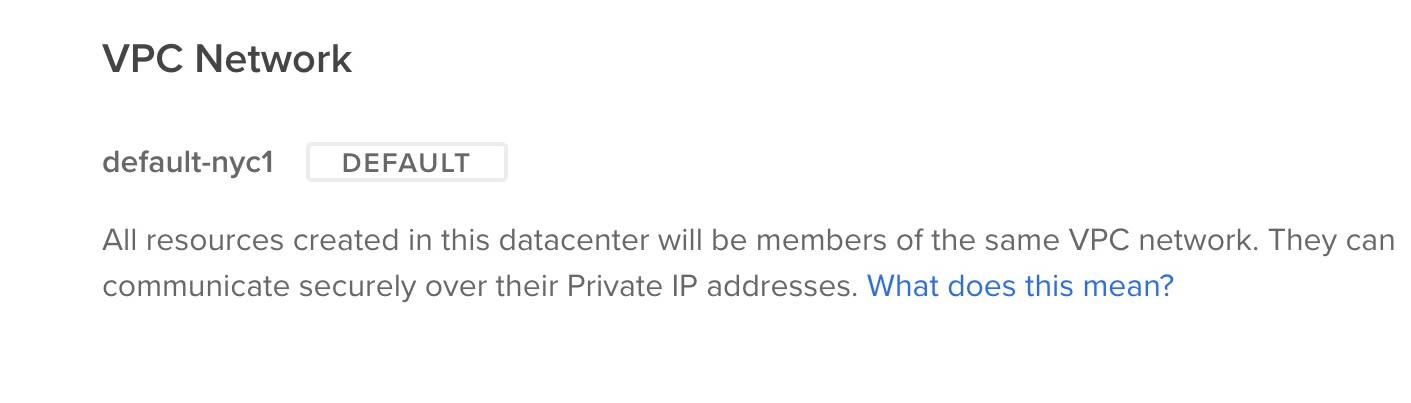
You can leave this to default also.
Select additional options Settings
You can decide what to do here, for me I prefer to enabling IPv6 option only, in other to access the IPv4 and 6.

Coming to the Authentication Settings
We can choose the Password option , looks easy to me, so now let's enter our password.
This passoword is what we will be using to login into our Ubuntu VPS

Make sure its a password you can remember because that’s what you will be using to log into your root user on your VPS.
Moving to the Finalize and create Settings
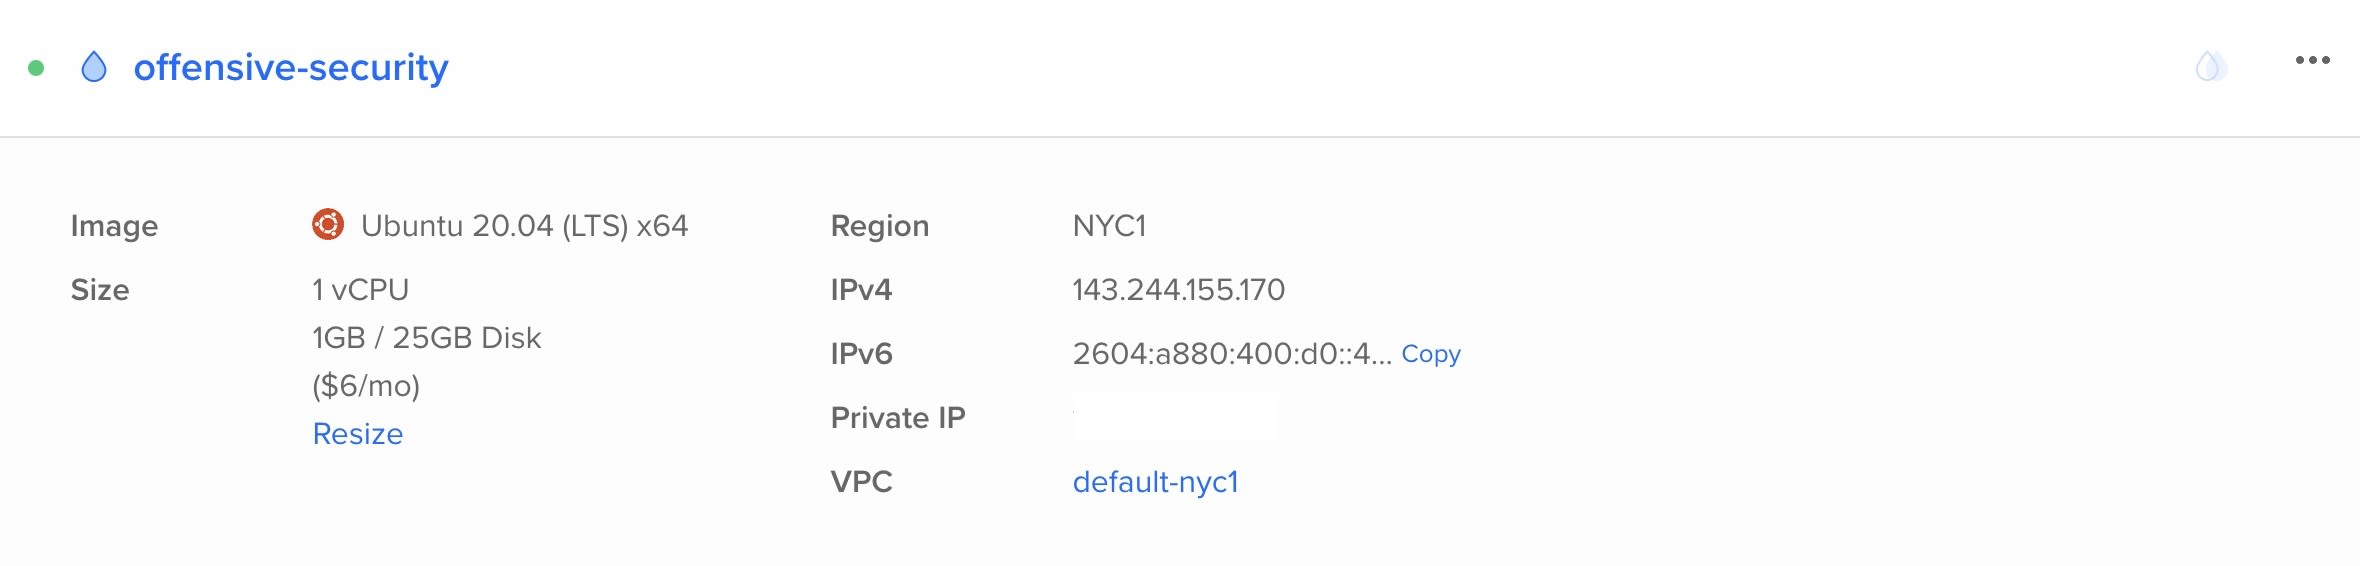
Here you can rename your host name to anything you like, i changed mine to offensive-security
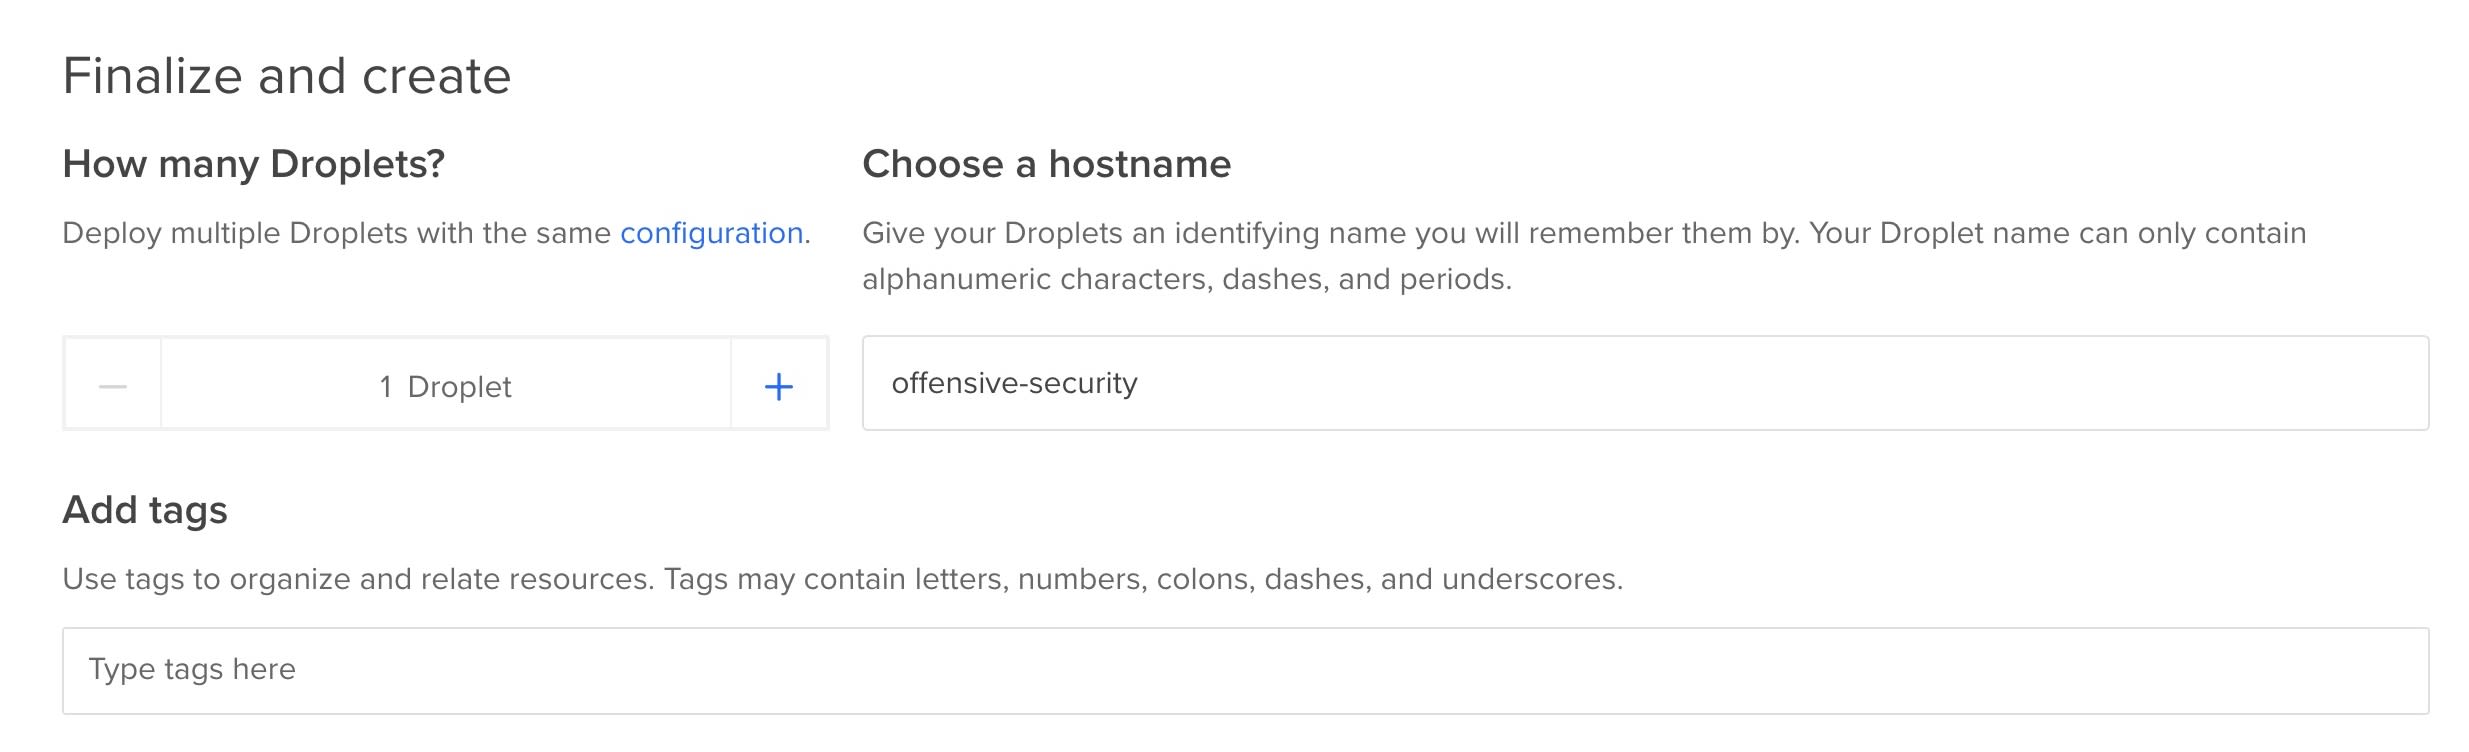
For the Add tags, you can skip it, it has no effect

Finally hit the Create Droplet button and your main dashboard should look like this
How to Connect into your Ubuntu Linux VPS from Any Terminal
Heres how you can access your ubuntu VPS Server from any Terminal, be it Mac default Terminal, Even from your Kali Terminal, Termux or any other linux terminal.
Type the command
ssh root@IP_Adrress_Of_Your_Droplet
You find the IP_Adrress_Of_Your_Droplet on your droplet dashboard
Copy that IPv4, that's your Droplet IP addrress, your command then will look likw this.
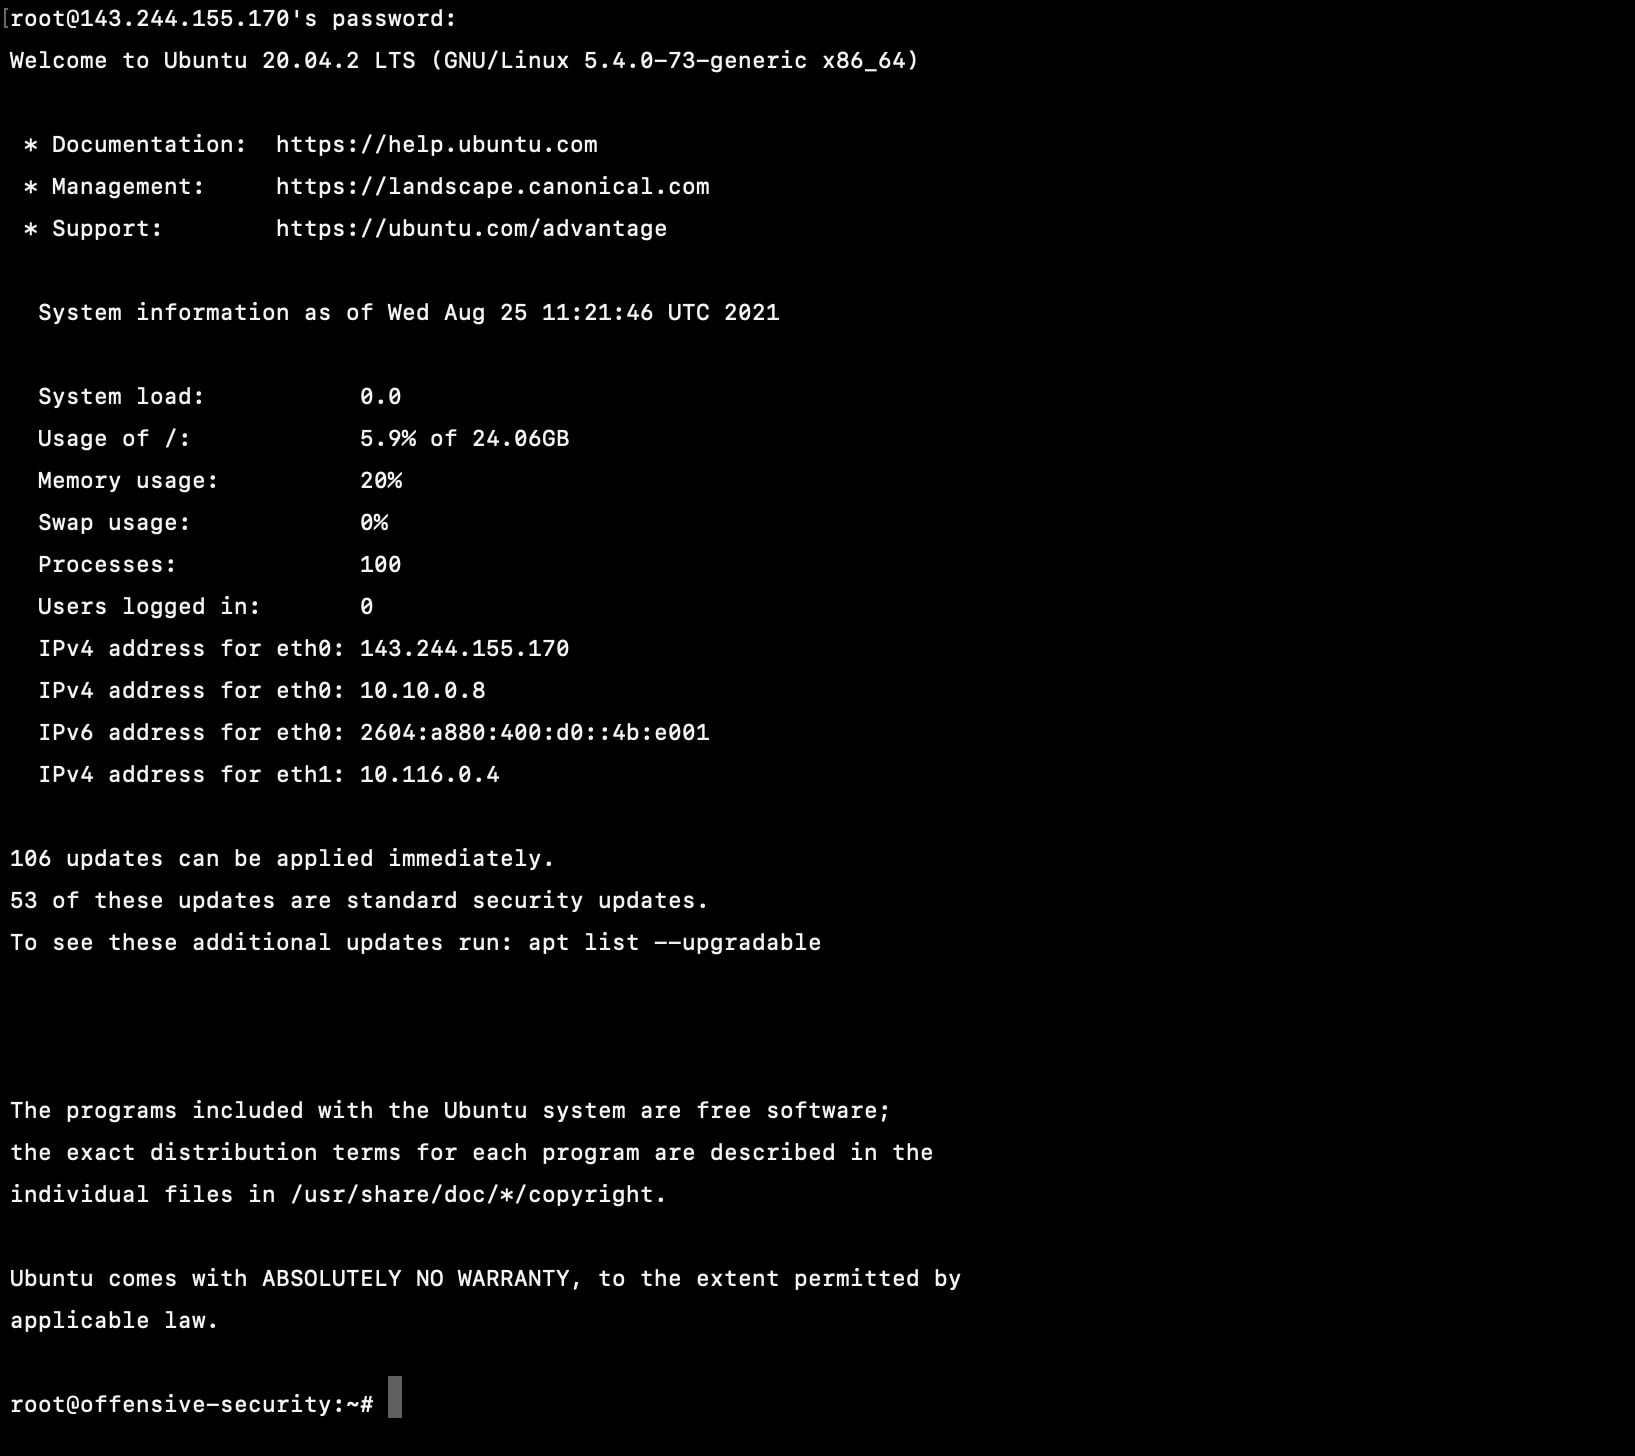
after running this command you wil be prompted to enter Yes/No, enter yes to proceed, then you will be asked to enter your server password.

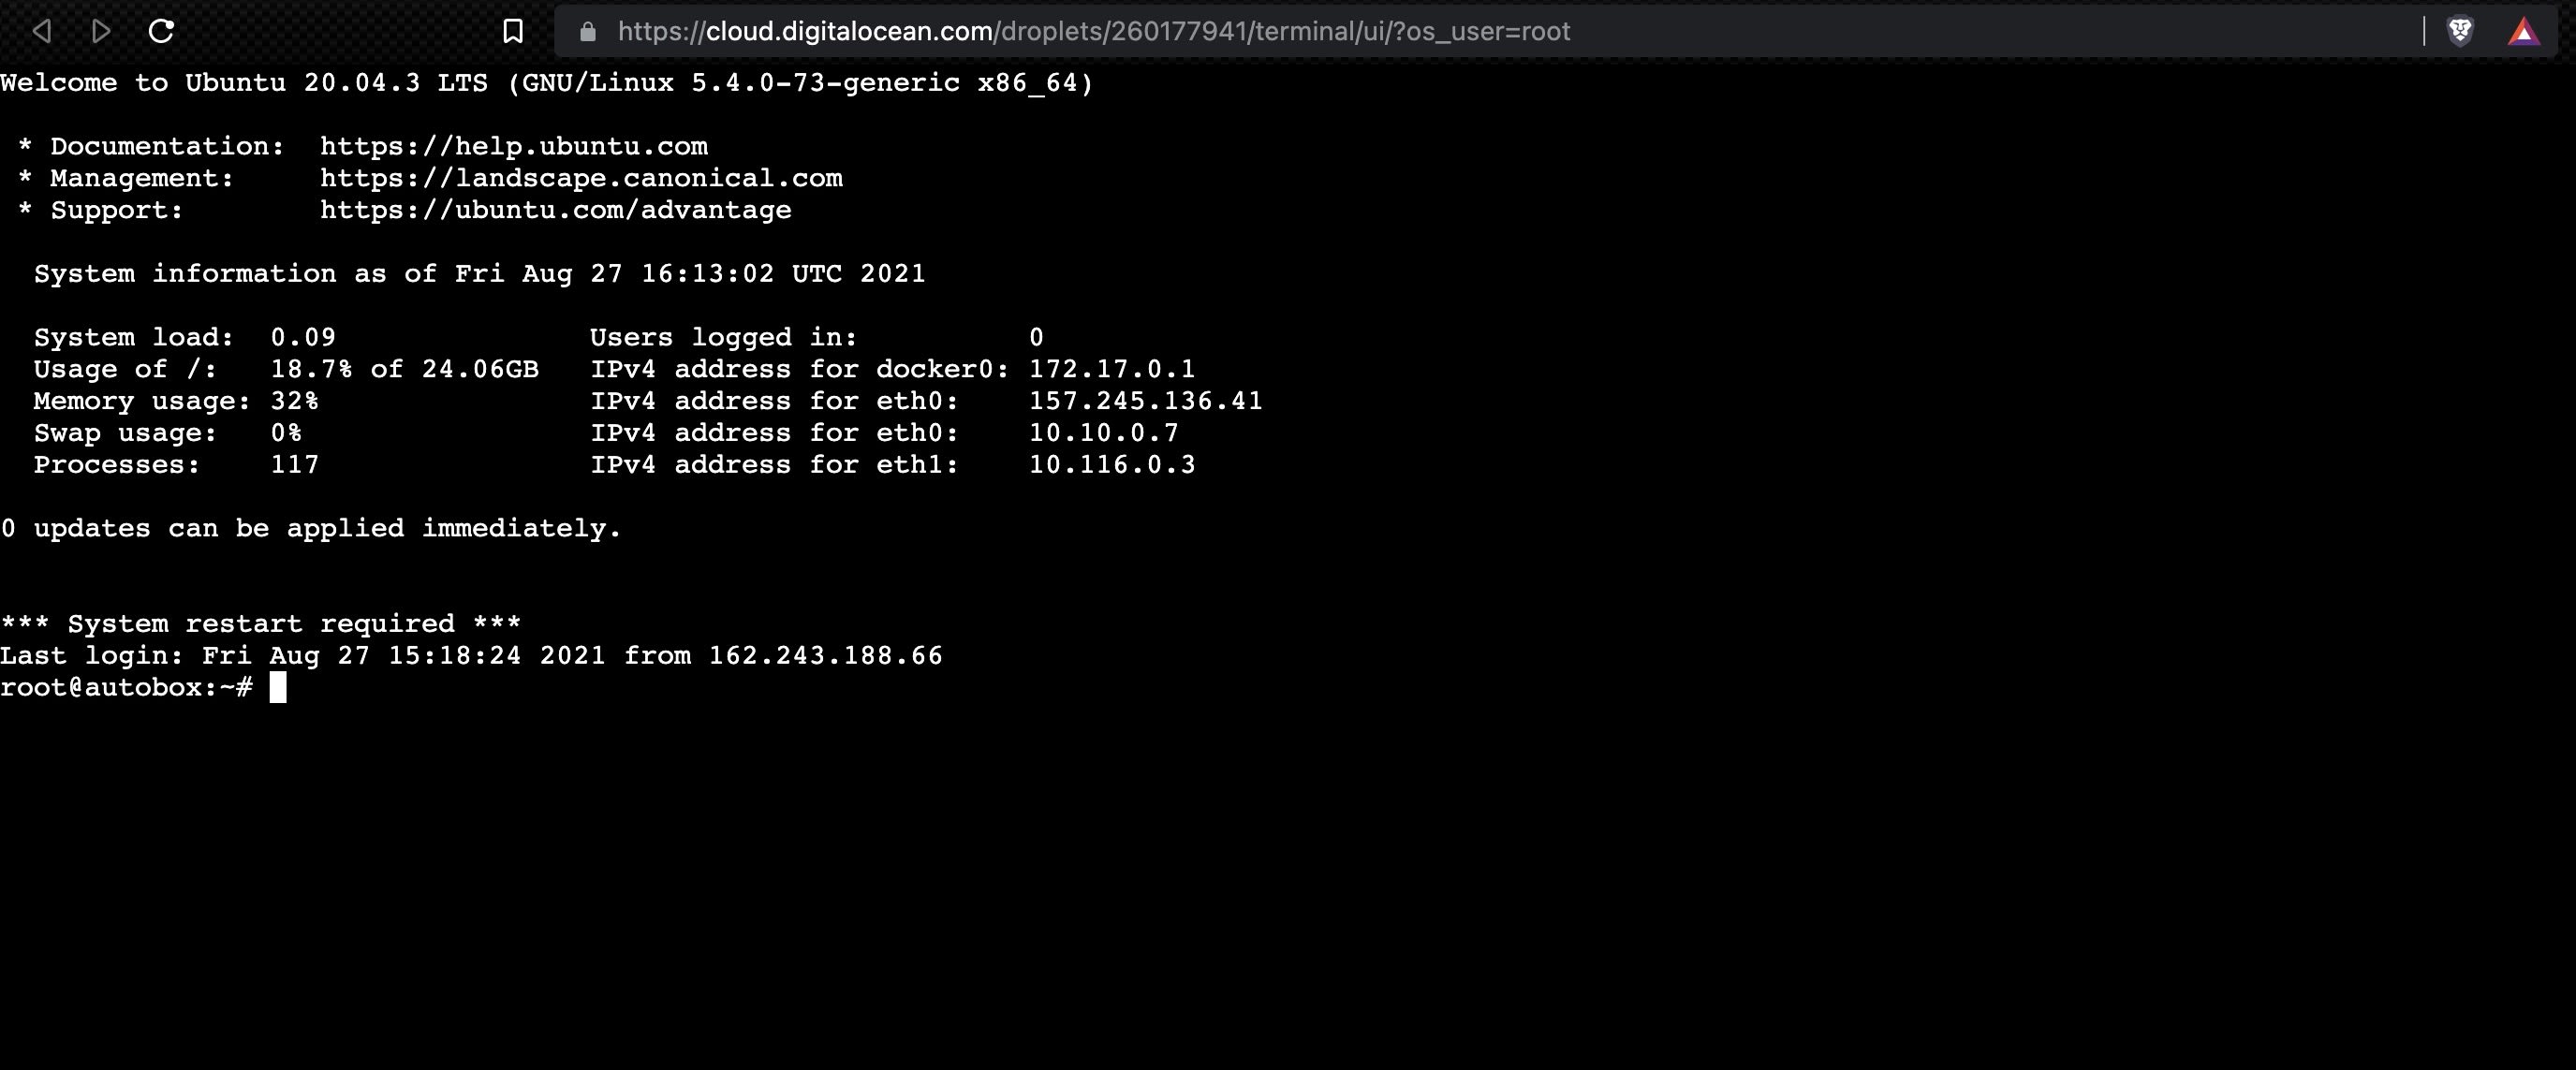
Your password is the password you entered while creating your Ubuntu VPS, after entering your password you will access your Ubuntu VPS now and your screen should look like this.
Then run this command to update and upgrade packages in your Ubuntu VPS
apt update && apt upgrade
The below image pop-up will appear on your screen, navigate to the "Install the package maintainer's version" option and hit the ENTER button.
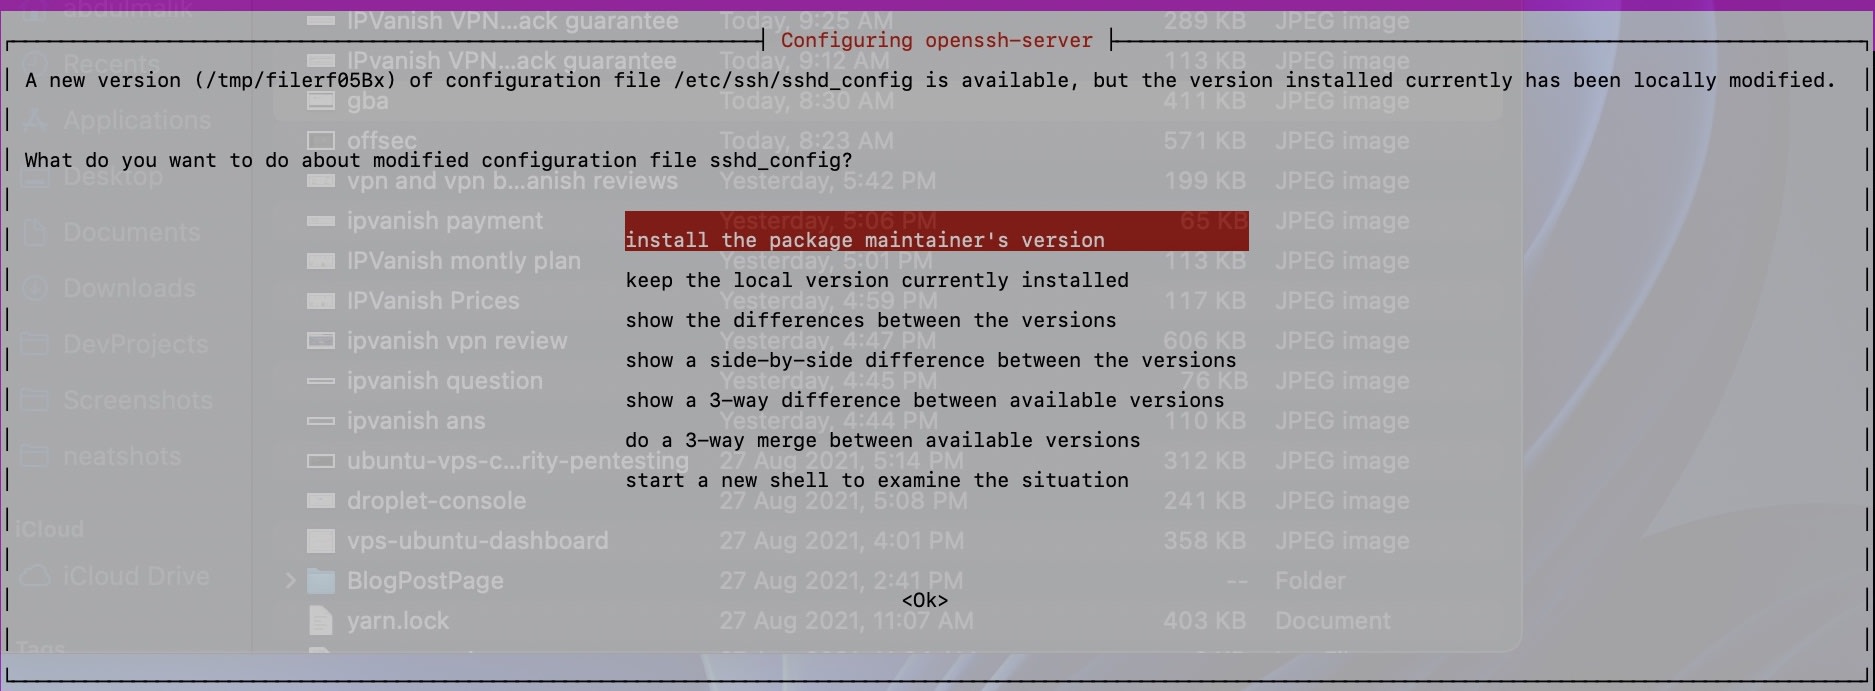
This only occur ones and won't popup again when you run the apt update && apt upgrade command.
Thats all.
You can also choose to go further by creating a user, instead of doing everything using the root user
To create a suer on your Ubuntu VPS, run this command
adduser YOURNAME
e.g
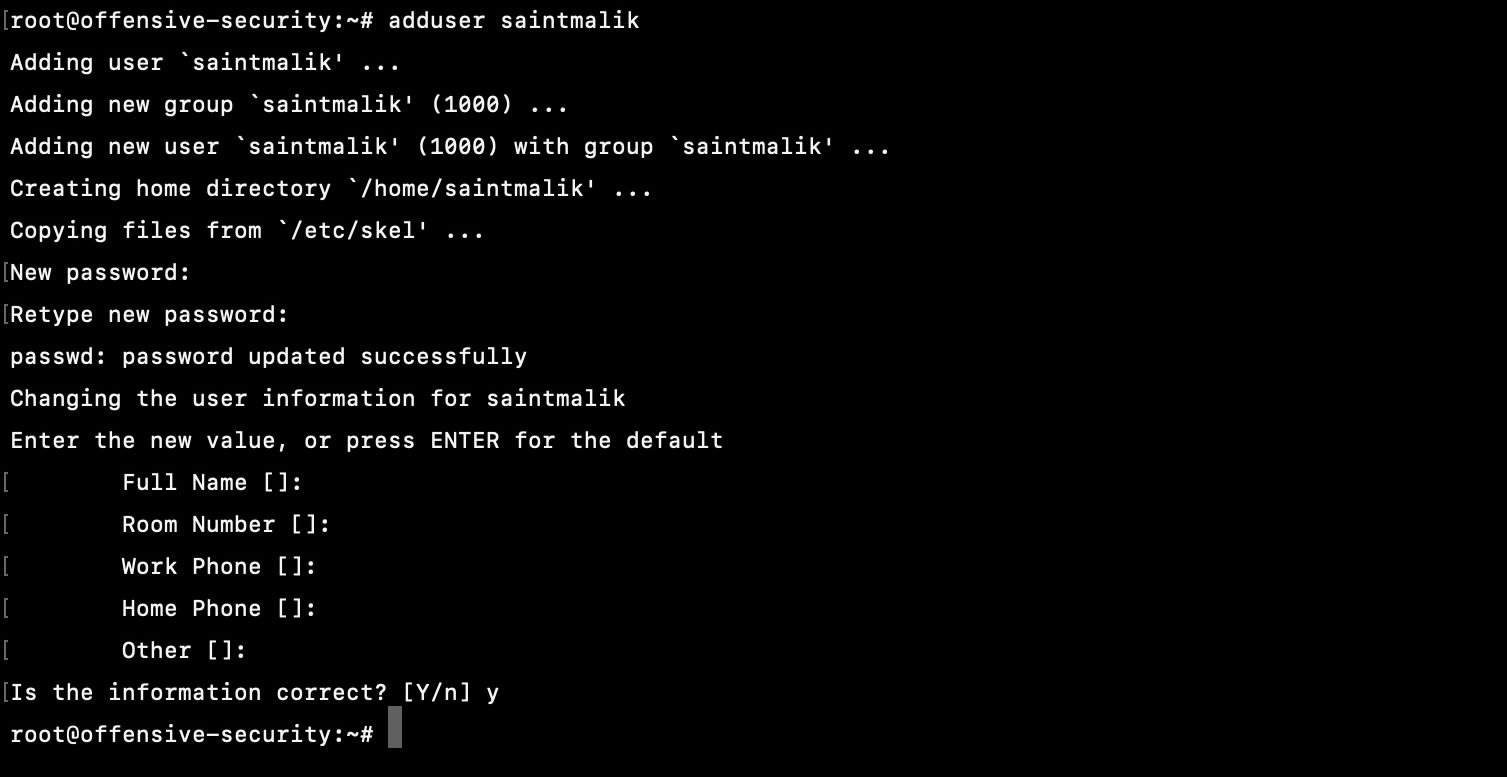
adduser saintmalik
You will be prompted to enter the user password and some informations, you can skip the information part by just hitting the ENTER button.
You can also confirm if the user has been created using this command
tail -5 /etc/passwd
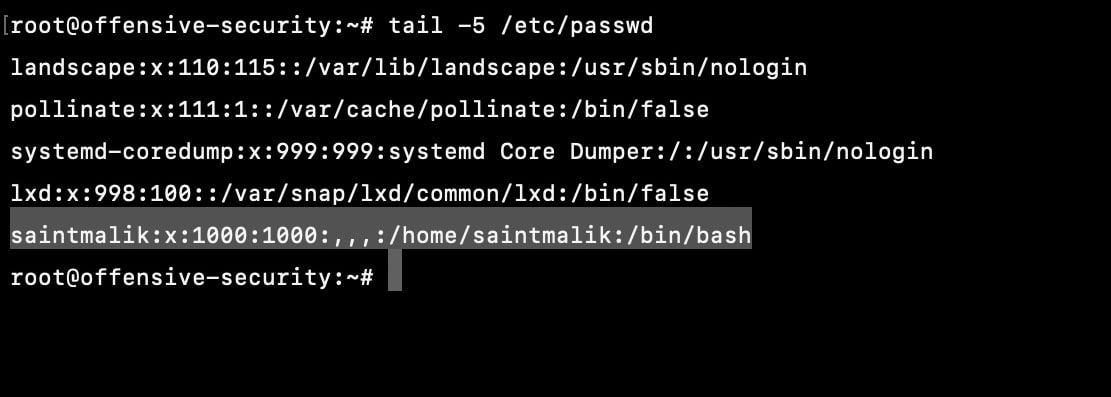
If we have confirmed that the user is created, we can then go ahead to add the user to the sudo group using this command.
usermod -aG sudo USER
replace USER with the name of the user you created.
Now that we have created a new user called "Saintmalik" , we can then go ahead to connect into our Ubuntu VPS using this command
ssh saintmalik@IP_Adrress_Of_Your_Droplet
You wil replace the IP_Adrress_Of_Your_Droplet to your Ubuntu IP address just like this
You will be asked to enter your password, this time around the password you will be using is the password you used while createing the user "saintmalik"
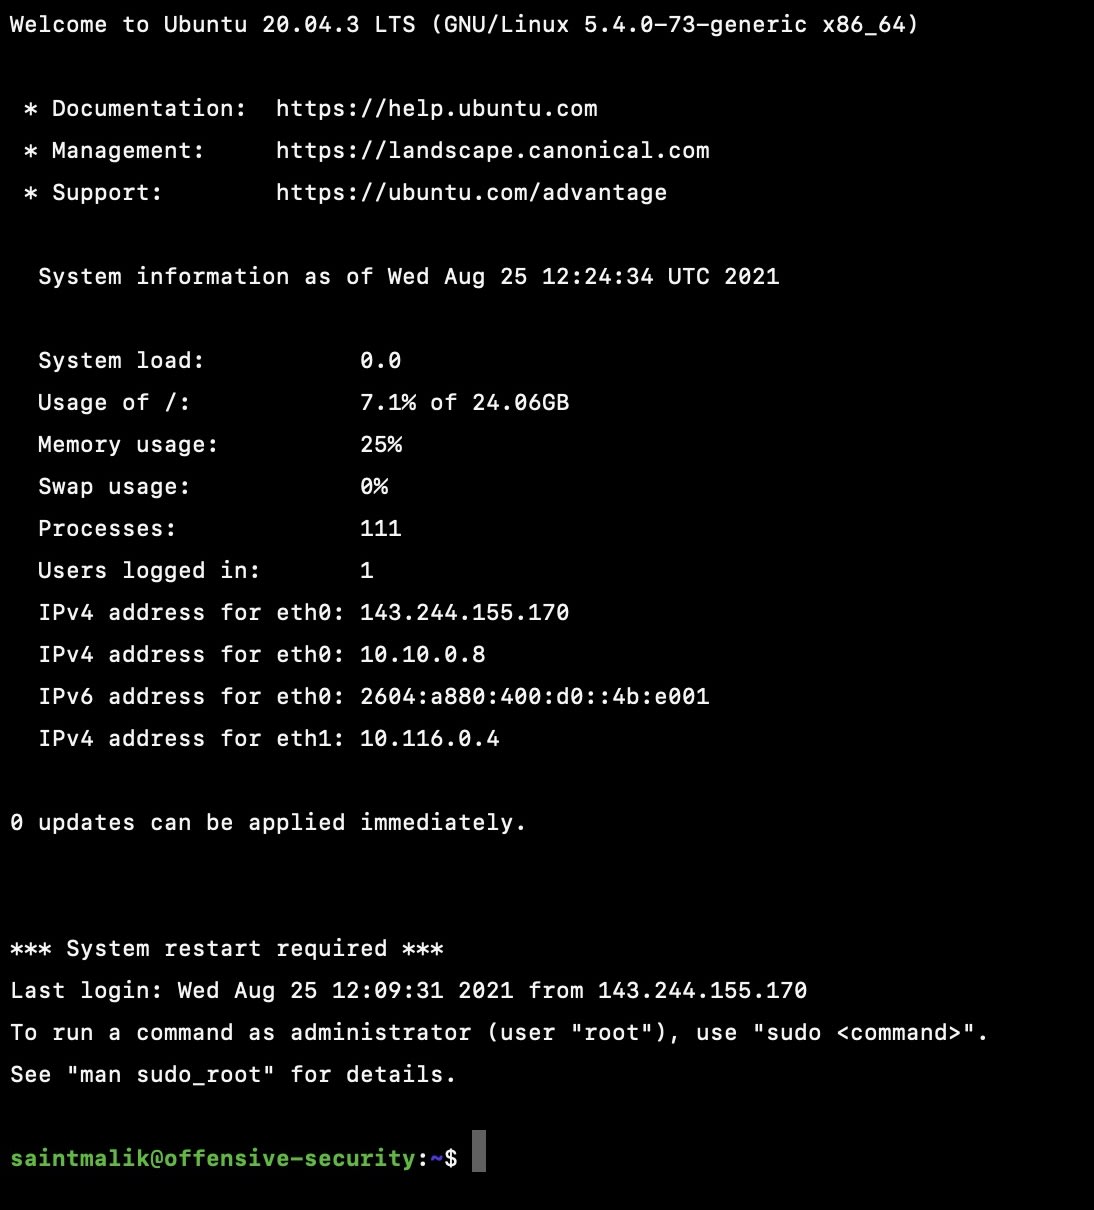
You are good to go now.
How to Connect into your Ubuntu Linux VPS from Windows System
Window buddies, i know you have powershell, but it stressfulll if you try to run some linux command and you get that error of command doesn't exit.
So now you need to connect to your created Ubuntu Linux VPS, you can't use powershell.
Use Putty.exe – https://www.putty.org/ to ssh/connect into the our created ubuntu VPS.
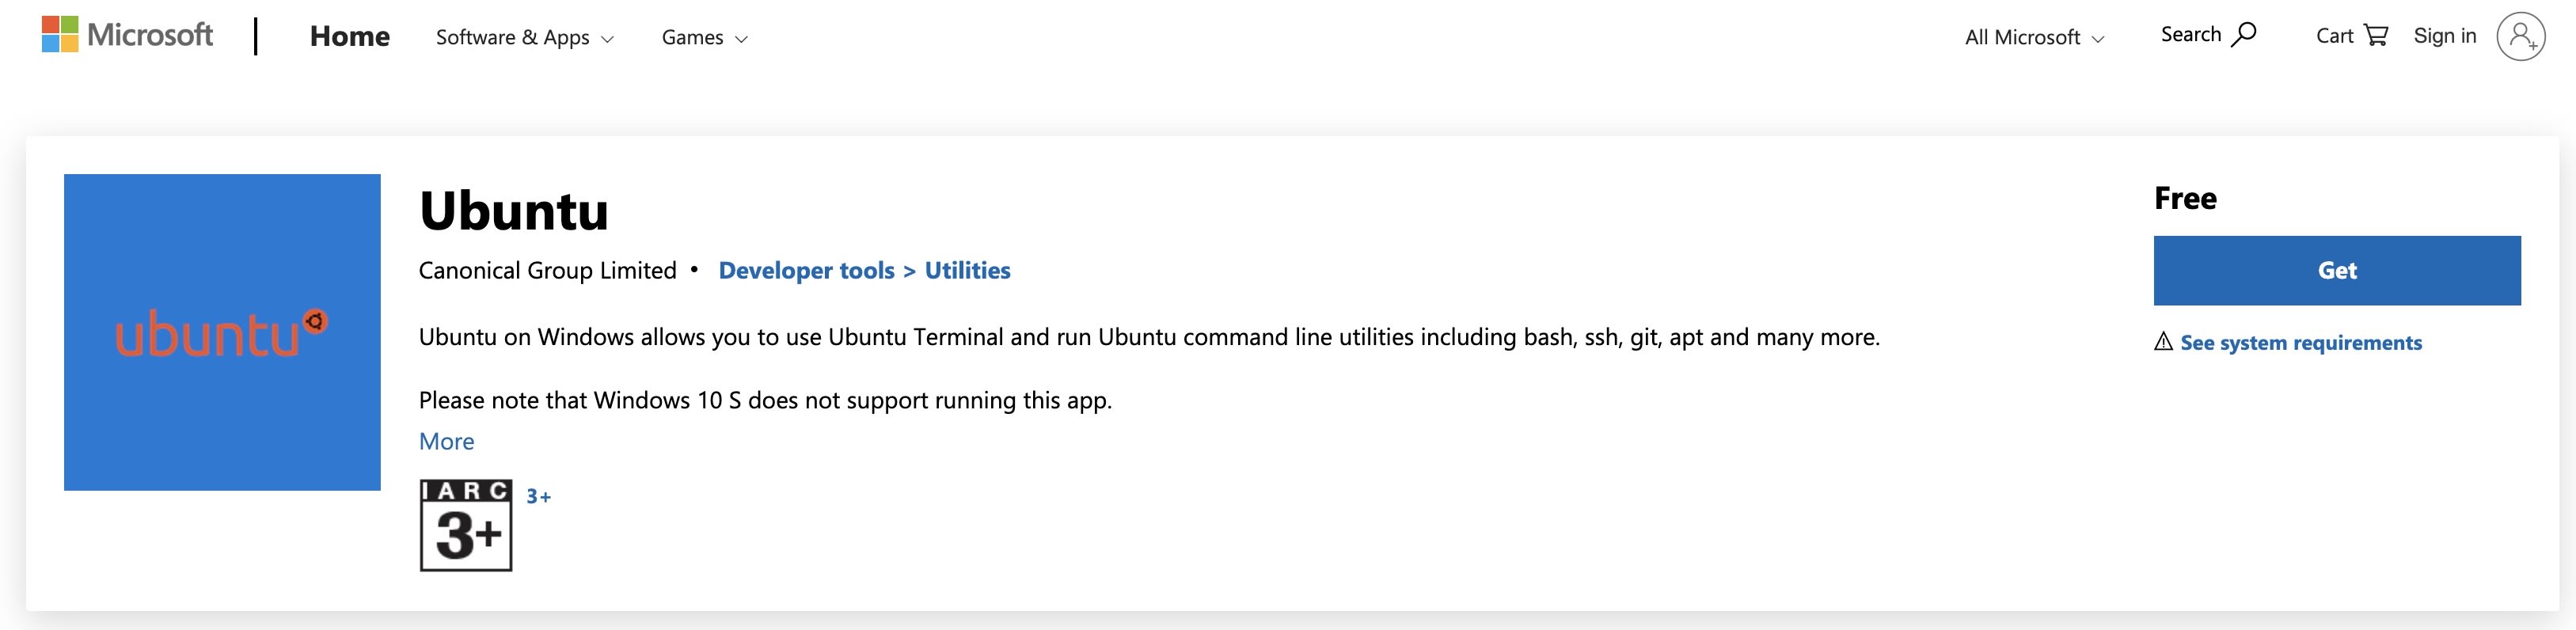
Also we can use Windows Subsystem for Linux, go to Microsoft Store under the Developer tools Utilities category and search for Ubuntu.
When it installs fully and you have a terminal opened up on your screen, follow the process we've explained above.
Accessing your Ubuntu VPS through Digital Ocean Droplet Console
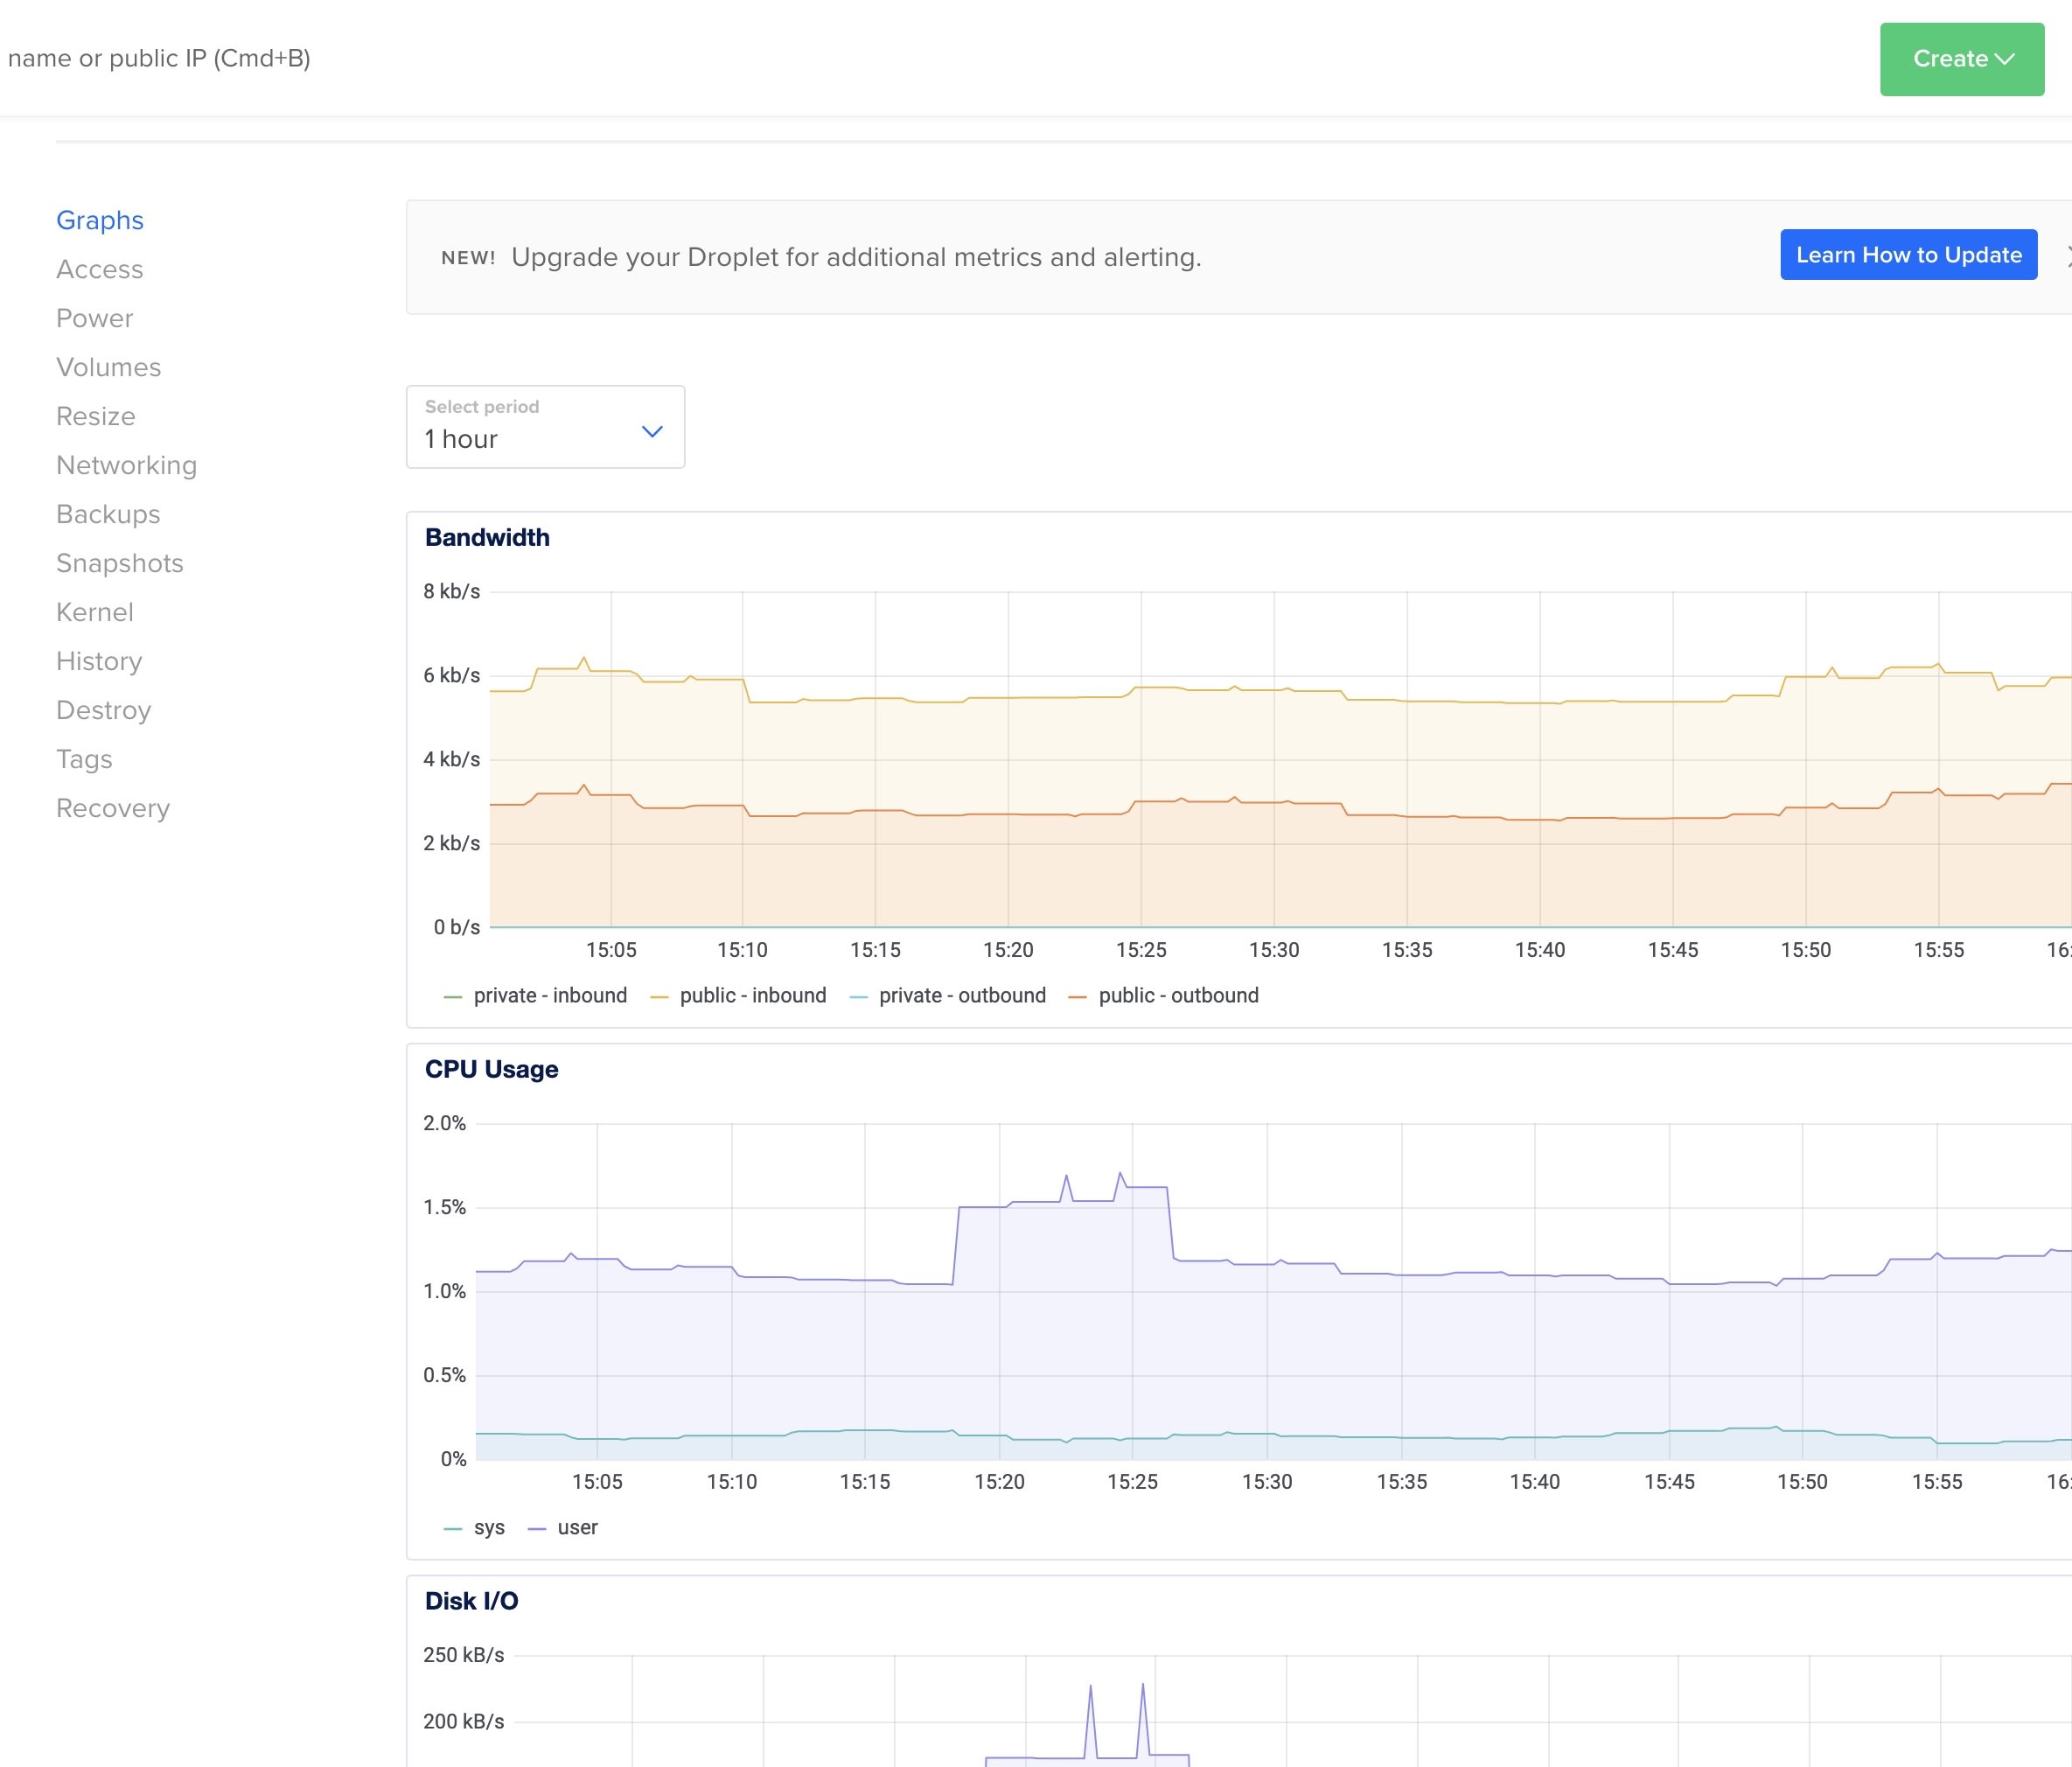
On your Digital Ocean account, under the droplet dashboard, click on the droplet you created to see more options and settings.
Click on the Access option as you can see in the screenshot below.
Then you see a new dashboard with details like Droplet Console , Recovery Console Reset root password.
Just click the Launch Droplet Console, allso you can xhoose to launch droplet as the uer you created by putting the username of the created user you've created earlier in that Log in as...... box.
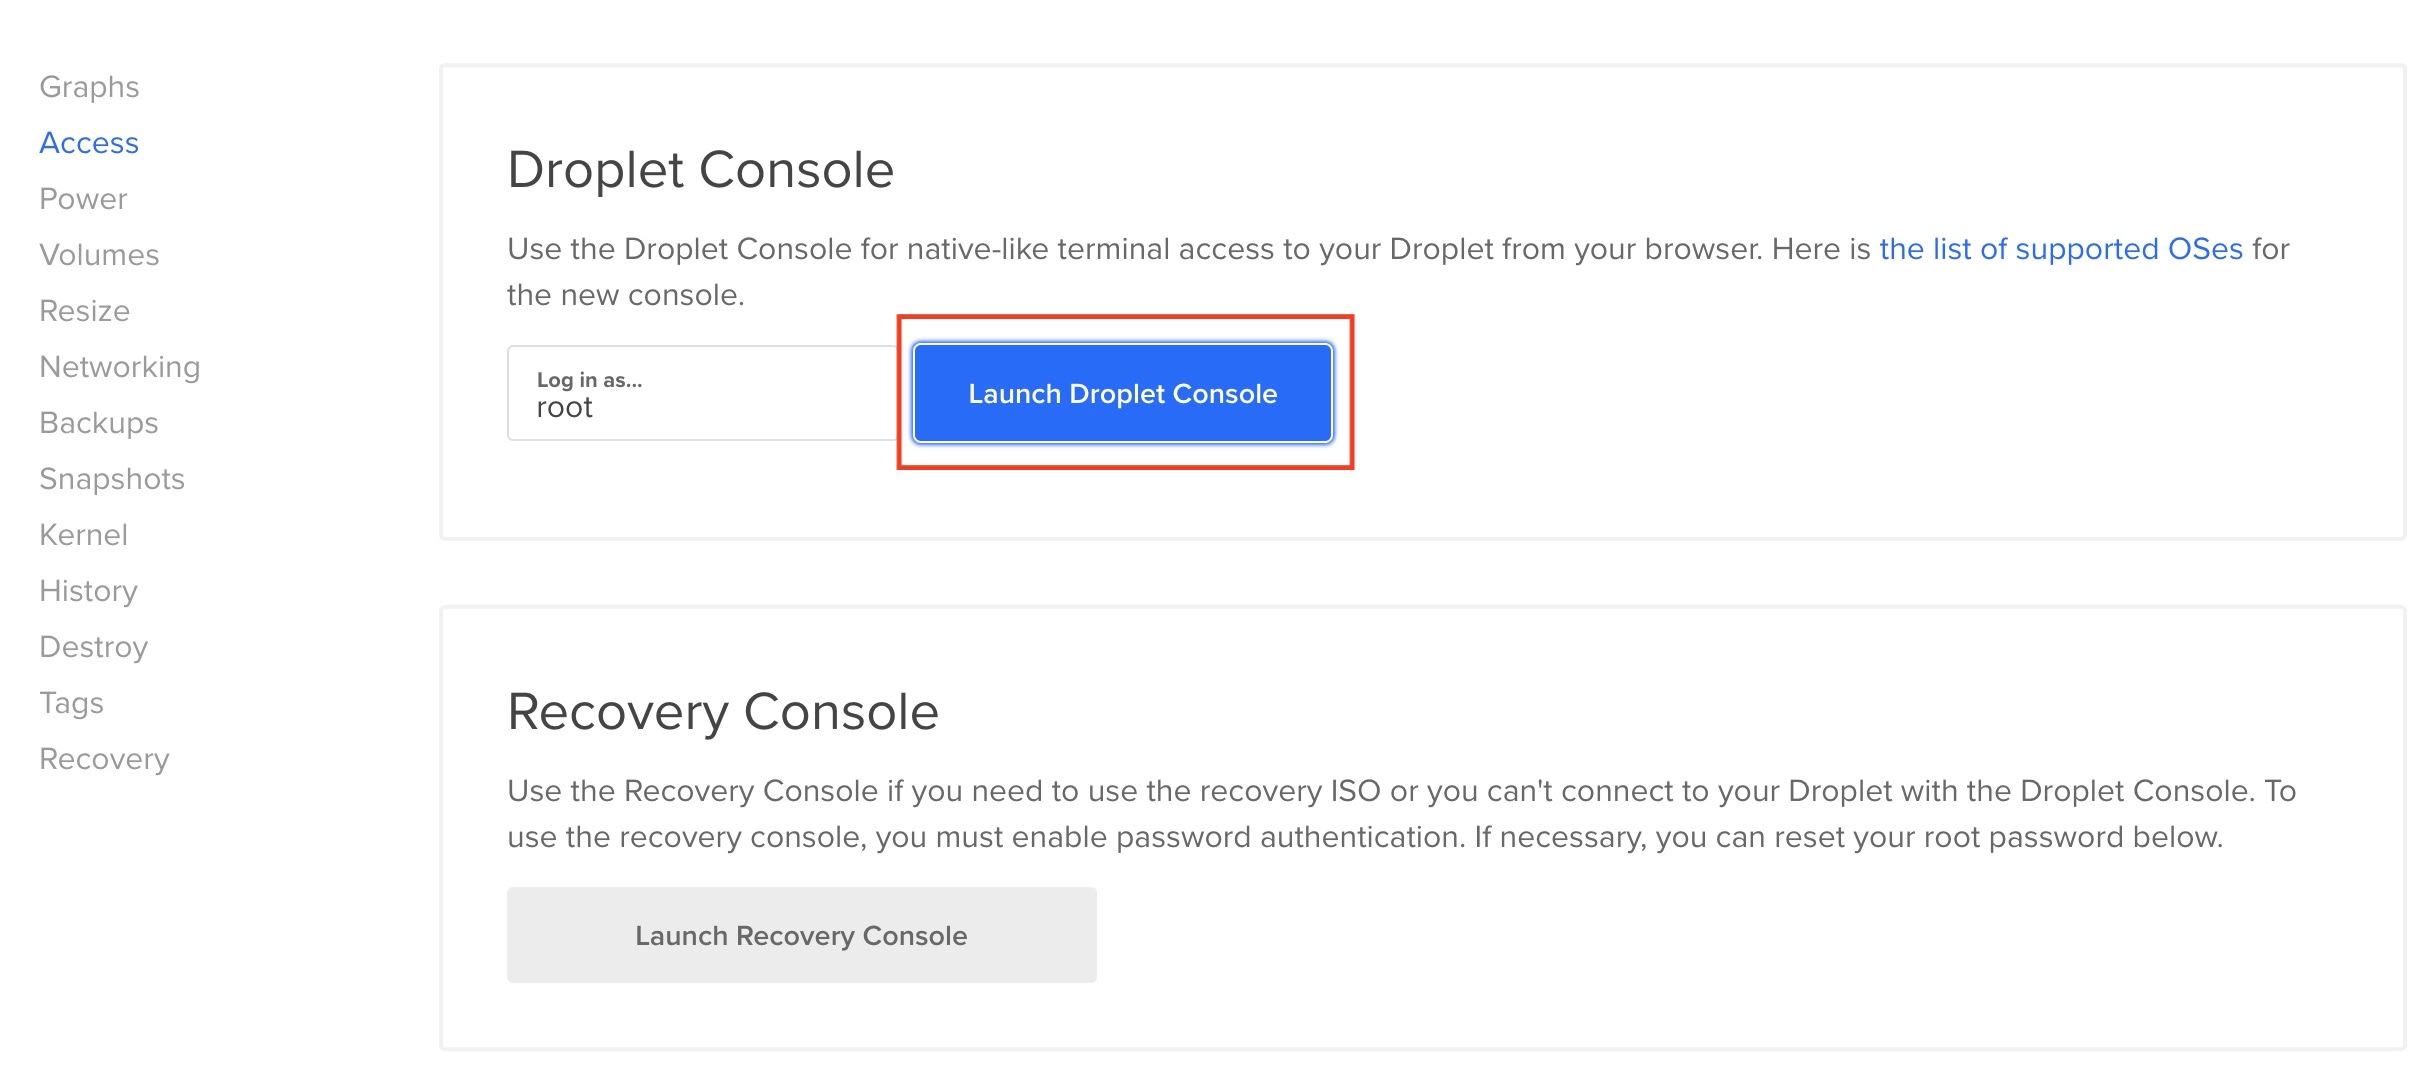
Then you can be using your Ubuntu VPS on your browser through Digital Ocean Droplet Console.
For android users, you can also access your VPS via your phone using UserLand
Also if you are stress out with typing "nano", "grep" all type, you can read this guide here Easy Access to Pentesting VPS with via VS Code
For visual guides, check NahamSec Video here;