Reduce Cloud Costs and Prevent Noisy Neighbors with Resource Quotas in Kubernetes
Setting resource quotas such as CPU and memory limits/requests is easier said than done.
But why do you need this in the first place?
Let's say your container images get compromised or there was a breakthrough in your containers and the vector actors decided to use your container to host and run their heavy scripts or cryptomines.
With the absence of resource quotas, those containers will keep on consuming all the needed CPU and memories they need to survive, hence using more instances.
if you luckily have the nodes auto scalers available.
And it still took you a while to detect this, you should be expecting some big $ invoice from AWS/GCP by month's end, haha.
Now that you know the reasons why you need to set this up, let's jump into it;
What are resource limits
Resource limits are the limitations you've assigned to a container, so when this container reaches these limits, its processes get killed.
meaning the container can't consume beyond the memory and CPU amount you've indicated.
Imagine setting a resource limits cpu to 333Mi
Once this CPU limit has been reached, then any other process requesting for more CPU won't be allowed, and neither will your container be killed too.
You can also read about how kubernetes kills this process with Out of Memory KIlling.
What are resource requests
Resource requests are considered as the definition of what your container needs to run on.
so when you declare resource requests, the scheduler makes sure that the certain amount you requested is reserved for your container in the node they are being assigned to.
Adding the resource quotas to your containers
apiVersion: v1
kind: Deployment
metadata:
   name: test-pod
   namespace: test-ns
spec:
   containers:
   - name: flyon
     image: repo/flypon
     resources:
       requests:
         cpu: "250m"
         memory: "64Mi"
       limits:
         memory: "128Mi"
         cpu: "500m"
Now you've added the cpu and memory allocations for both the resource requests and limits.
But wait, are these CPU and memory values added based on vibes? well no
the values have to be determined, but getting the estimated or right values can vary based on your applications.
Getting the right resource limits and requests
The best way to get these values is during the runtime of the application.
there are different ways of going about getting the values, you can either leverage on load testing or use VPA(Vertical Pods Autoscaler).
Load Testing Using Locust
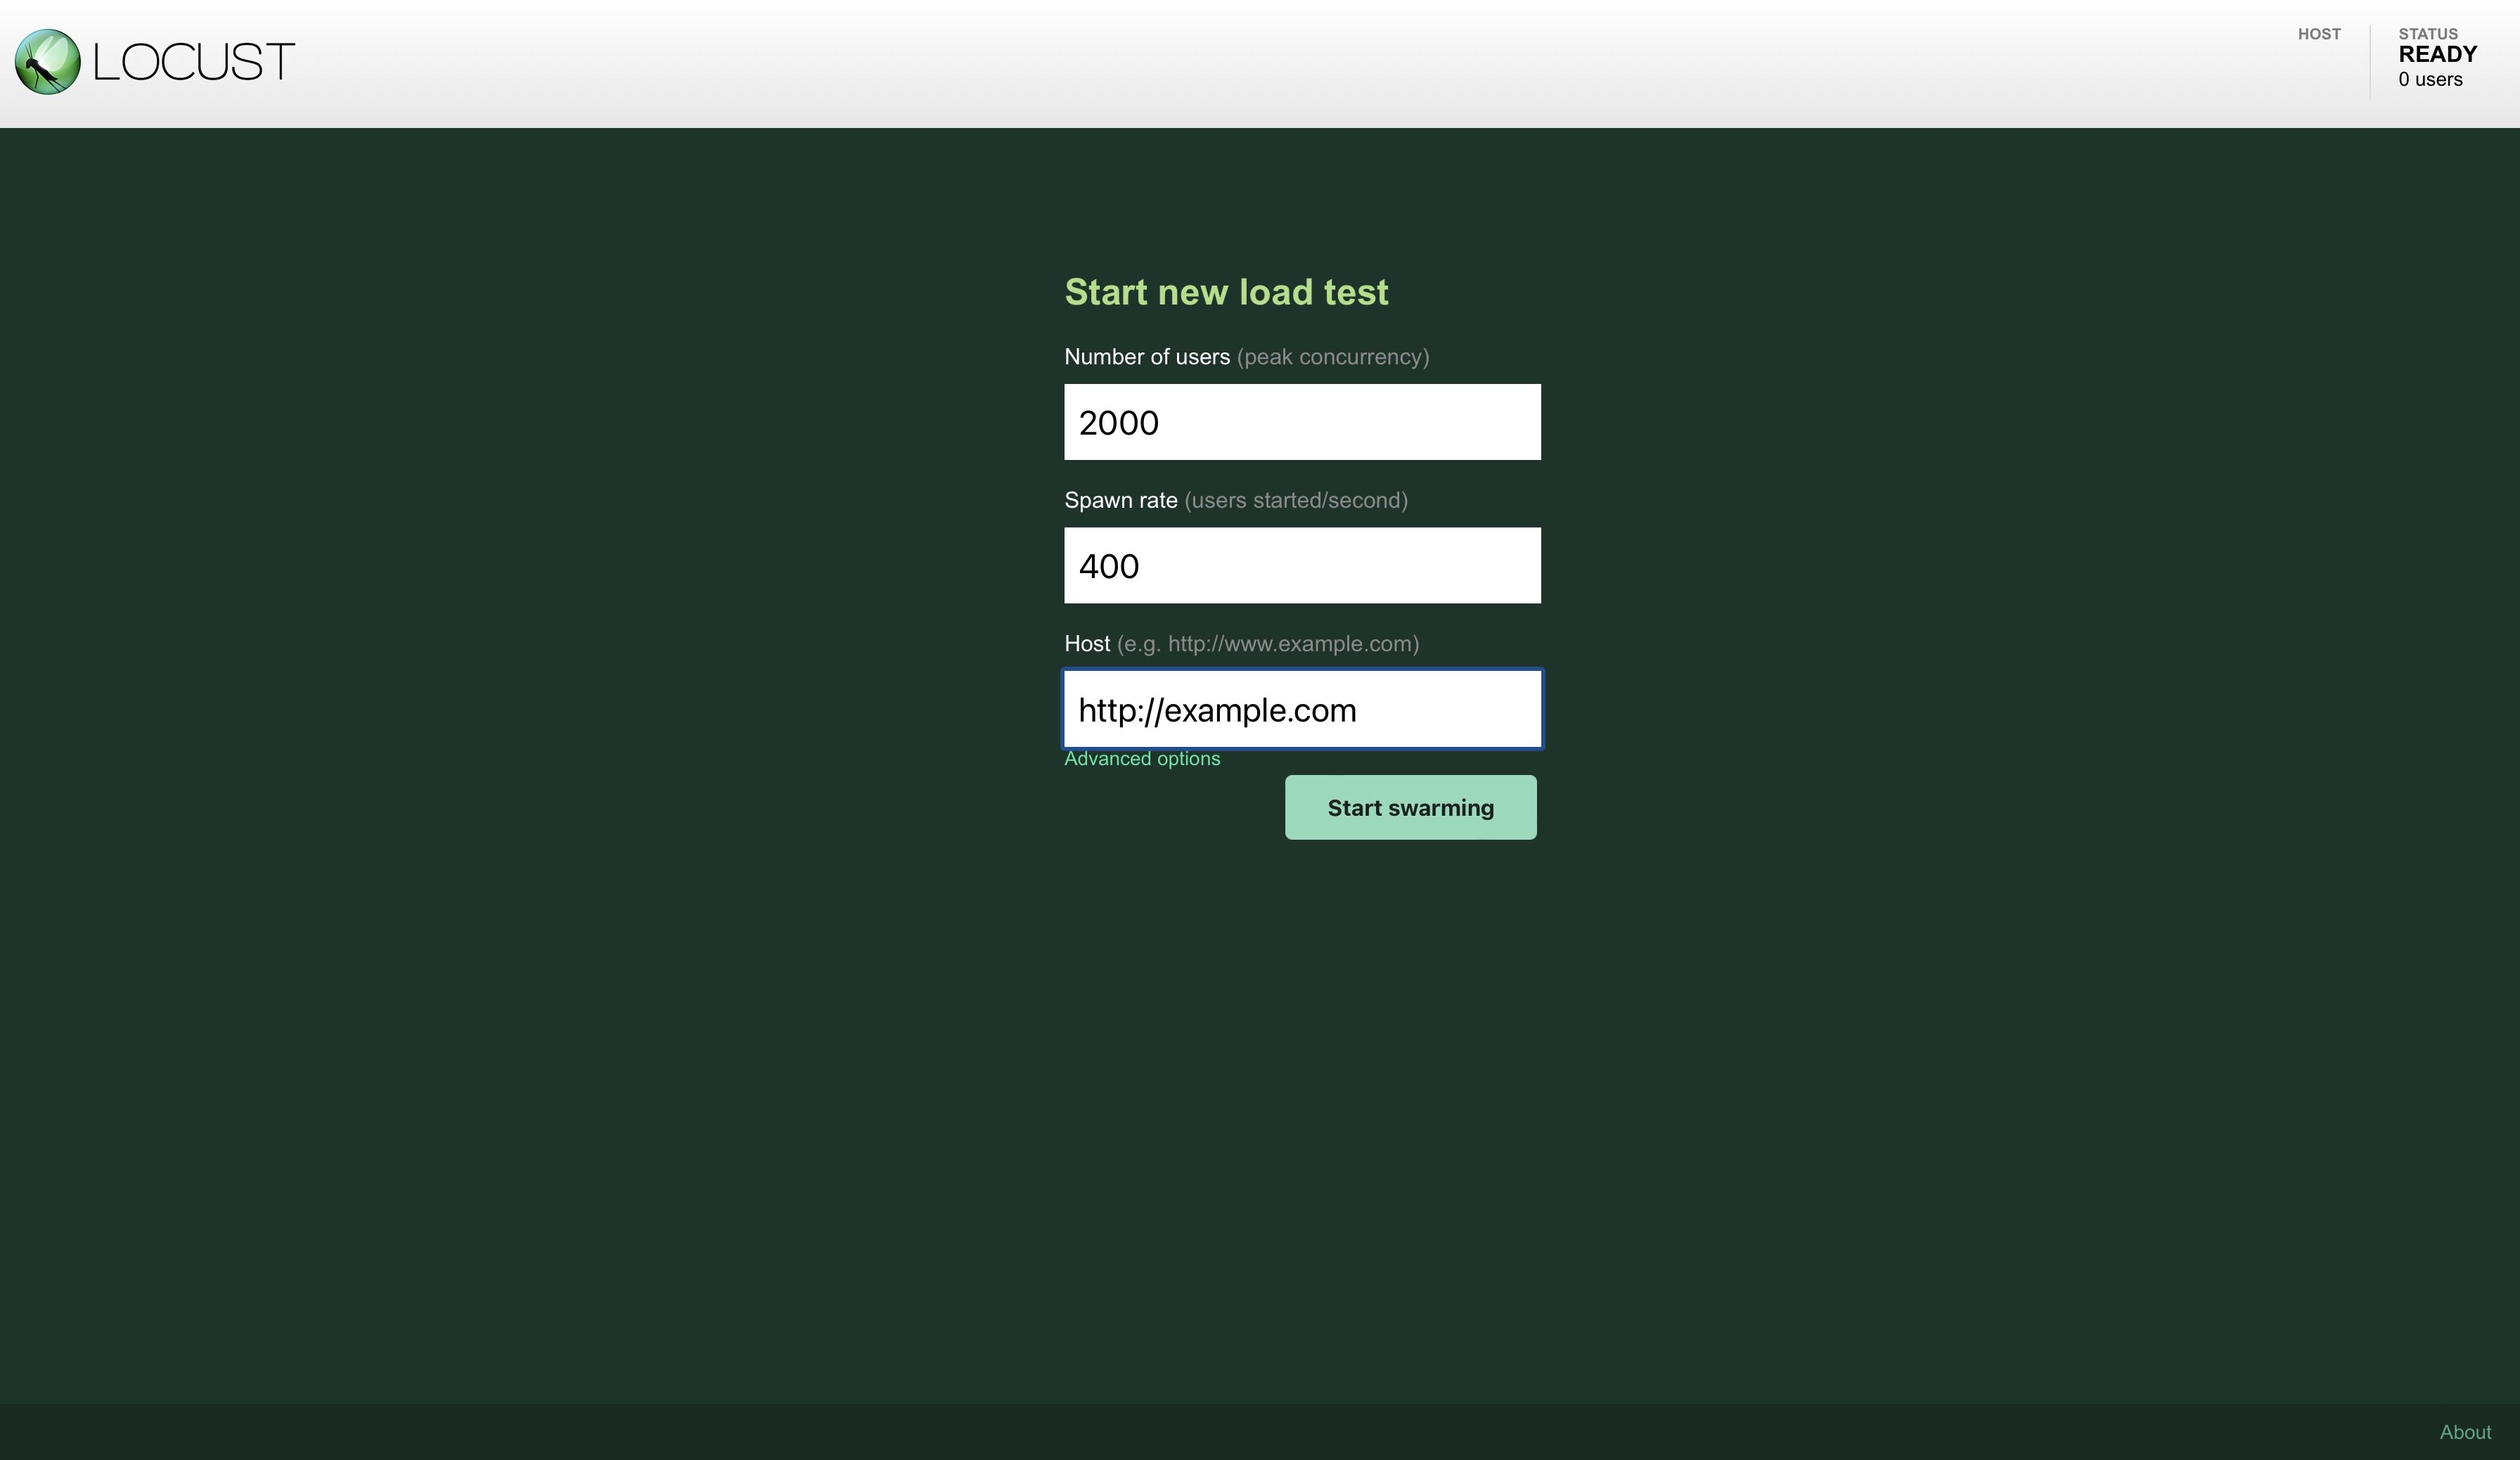
for the load testing, use Locust, a very power open source load testing tools.

so here is how it works, you can specify the number of users you estimate for your app and the number of users sending requests/seconds.
meaning you are imitating the app usage in production mode, hence you can see how many resources are being consumed by your app.
Running kubectl top pods would return the metrics of the pods based on their CPU and memory consumption.
with those results, you can set meaningful resource quotas.
Using VPA to get resource quotas
VPA is a cluster component that handles the autoscaling for Kubernetes.
It can also help with estimating the correct resource requests and limits for our container.
first, you have to install VPA in your cluster
git clone https://github.com/kubernetes/autoscaler.git && cd autoscaler/vertical-pod-autoscaler && ./hack/vpa-up.sh
run kubectl get all -n kube-system to confirm if VPA has been installed successfully.
if the installation goes well, it's time for the tests, to get VPA to give the estimates of the resource limits and requests that the app needs.
create vpa.yaml file and paste the following yaml config
apiVersion: "autoscaling.k8s.io/v1beta2"
kind: VerticalPodAutoscaler
metadata:
  name: flyon-vpa-test
spec:
  targetRef:
    apiVersion: "apps/v1"
    kind: Deployment
    name: flyon
  updatePolicy:
    updateMode: "Auto"
  resourcePolicy:
    containerPolicies:
      - containerName: '*'
so I have chosen to use Auto for updateMode, what does this mean?
it means the container gets recreated based on the VPA recommendations.
there are options like Off, Initial, Recreate
Now let us check the VPA recommendations, you should run kubectl get vpa to get all the available VPA deployments.
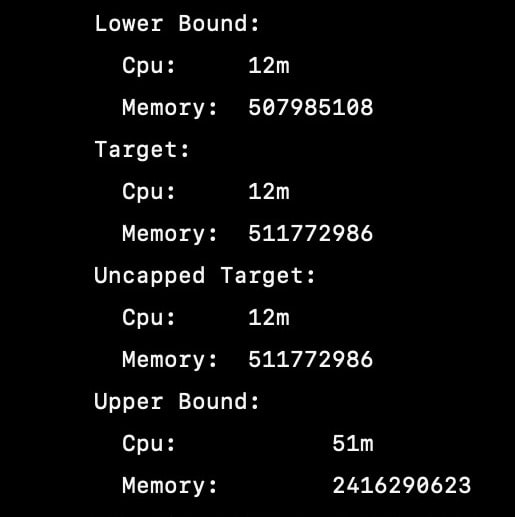
then run kubectl describe vpa VPANAME, example kubectl describe vpa flyon-vpa-test and here are the outputs from mine.

-
Lower bound: this is the minimum estimation for the container.
-
Target: this the one you will use for setting resource requests.
-
Uncapped target: this is the resource limit and request to be used by your container if you didn't configure max allowed and min allowed in your VPA definition.
-
Upper bound: maximum recommended resource estimation for the container, anything set beyond this would be a waste of resource
You don't need to do all these as a Sec individual if there are DevOps individuals in your team.
you should be more concerned about implementing policies at the cluster levels.
so deployments without resource quotas are not allowed to start.
With the resource quotas recommendation you've seen now, let's rewrite our container deployment.
would be using the Lower bound results for the resource request and the Upper bound results for resource limits
apiVersion: v1
kind: Deployment
metadata:
   name: test-pod
   namespace: test-ns
spec:
   containers:
   - name: flyon
     image: repo/flypon
     resources:
       requests:
         cpu: "12m"
         memory: "485Mi"
       limits:
         cpu: "51m"
         memory: "2304Mi"
for the values of memory, you probably wondering how to go about it?.
having those long digits, well those values are in bytes, you will need to convert them to Mebitytes (Mi).
Well, that's it, folks! I hope you find this piece insightful and helpful.
You can also read more about defining resource quotas at the namespace level using limit ranges or ResourceQuotas
