How to automate HashiCorp Vault backup and restoration in AWS EKS with Terraform
So you've moved your organization's secret management process to Hashicorp Vault on Kubernetes? everything is working well, but you are about to promote to production, this brings a lot of questions about stability, recovery and fully operational vault servicing your deployments.
That being said, how do you achieve this, since you have an HA(High Availability) Vault working in your cluster already, that brings us to Vault snapshots, periodically taking and storing the vault snapshots in storages like AWS s3 is the way.
Prerequisite
- A working vault deployment in your cluster provisioned with Terraform
- A working S3 storage bucket to store your snapshots
So Let's jump into it;
Setting Authentication with Vault and S3 Bucket
If I guess right, you probably think you are going get your AWS secret key and that's what you will be using in authenticating Vault and AWS s3.
Well, No you won't be doing that, since your goal is to eliminate the usage of secrets in config or plain form in the first place, time to set the auth process up.
👉 Create an S3 Policy
You need to create a new file named vault-backup.tf and add the following code.
resource "AWS_iam_policy" "vault_backup_access_policy" {
  name   = "VaultBackupPolicyS3"
  policy = jsonencode({
    Version = "2012-10-17"
    Statement = [
      {
        Action = [
          "s3:PutObject",
          "s3:GetObject",
          "s3:ListBucket",
        ]
        Effect   = "Allow"
        Resource = [
            "arn:AWS:s3:::YOUR BUCKET NAME",
            "arn:AWS:s3:::YOUR BUCKET NAME/*",
        ]
      },
    ]
  })
}
👉 Provision IAM Role Service Account (IRSA) for Vault S3 Access in EKS
before you proceed to creating an IRSA, you need to create a ServiceAccount that would be trusted by the assumed role you will be creating next.
resource "kubernetes_service_account_v1" "this" {
  metadata {
    name      = "vault-snapshotter"
    namespace = "vault"
    annotations = {
      "eks.amazonAWS.com/role-arn" = module.vault_irsa_role.iam_role_arn
    }
  }
  # automount_service_account_token = "true"
}
time to create the IRSA, as you can see, I am using an IRSA for eks module instead of going through the route of creating roles and attaching policy documents, this module makes creating IRSA for EKS clean and fast to create
module "vault_irsa_role" {
  source  = "terraform-AWS-modules/iam/AWS//modules/iam-role-for-service-accounts-eks"
  version = "5.20.0"

  role_name = "hashicorp-vault-snapshot"

  role_policy_arns = {
    policy = AWS_iam_policy.vault_backup_access_policy.arn
  }

  oidc_providers = {
    ex = {
      provider_arn               = module.eks.oidc_provider_arn
      namespace_service_accounts = ["vault:vault-snapshotter"]
    }
  }
}
That's all, we are done with configuring the auth process for the AWS s3 bucket access from the Kubernetes cluster.
Setting Up Vault Kubernetes Auth Engine
Hope you are aware there are different ways to authenticate with Vault, your root token, approle, GitHub and more, but we won't be going for any of this, we will be proceeding with Vault Kubernetes auth engine.
First, you need to create a new namespace called vault-client.
resource "kubernetes_namespace" "vault-client" {
  metadata {
    name = "vault-client"
  }
}
then you will create a ServiceAccount in the vault-client namespace that vault can use to authenticate within the cluster, the ServiceAccount is what you will give to vault to get the vault token(jwt) for access to carry out the actions you need.
resource "kubernetes_service_account_v1" "vault_auth" {
  metadata {
    name      = "vault-auth"
    namespace = kubernetes_namespace.vault-client
  }
  automount_service_account_token = "true"
}
you will also need to create a cluster role binding with a service account attachment to authenticate with other Service Accounts within the cluster.
resource "kubernetes_cluster_role_binding" "vault_auth_role_binding" {
  metadata {
    name = "role-tokenreview-binding"
  }
  role_ref {
    api_group = "rbac.authorization.k8s.io"
    kind      = "ClusterRole"
    name      = "system:auth-delegator"
  }
  subject {
    kind      = "ServiceAccount"
    name      = kubernetes_service_account_v1.vault_auth.metadata[0].name
    namespace = kubernetes_namespace.vault-client.id
  }
}
You will have to create a Kubernetes secret with the ServiceAccount annotations which you will make available through the data block, which will then be used to authenticate Kubernetes in Vault in the next process.
resource "kubernetes_secret_v1" "vault_auth_sa" {
  metadata {
    name      = kubernetes_service_account_v1.vault_auth.metadata[0].name
    namespace = kubernetes_namespace.vault-client.id
    annotations = {
      "kubernetes.io/service-account.name" = kubernetes_service_account_v1.vault_auth.metadata[0].name
    }
  }
  type = "kubernetes.io/service-account-token"

  wait_for_service_account_token = true
}
The below codes are how you will get the secrets created from the ServiceAccount accessible for the next step in the Vault Kubernetes Engine.
data "kubernetes_secret_v1" "vault_auth_sa" {
  metadata {
    name      = kubernetes_service_account_v1.vault_auth.metadata[0].name
    namespace = kubernetes_namespace.vault-client.id
  }
}
👉 Configure Vault Kubernetes Engine
So you have created and permitted the Service Account to access other Service Accounts through the cluster role binding, it's time to configure authentication with Vault via the Kubernetes auth engine option.
But before you proceed, you need to update your provider.tf file to include the Vault provider and your existing vault server URL.
vault = {
    source  = "hashicorp/vault"
    version = "3.15.2"
}

provider "vault" {
  skip_tls_verify = true
  address         = "https://vault.YOURDOMAIN.com" //you can also replace it with your localhost server which you port forwarded https://localhost:8200
}
Once you have added your vault provider config, you can proceed to the next process, which is enabling the Kubernetes auth engine and authenticating the cluster access to Vault.
Since you might have this process available already in your vault, you would only notice a modification instead of the new creation of the Kubernetes vault engine when you run terraform plan
resource "vault_auth_backend" "kubernetes" {
  type       = "kubernetes"
  path       = "kubernetes"
}

resource "vault_kubernetes_auth_backend_config" "config" {
  backend                = vault_auth_backend.kubernetes.path
  kubernetes_host        = module.eks.cluster_endpoint
  kubernetes_ca_cert     = data.kubernetes_secret_v1.vault_auth_sa.data["ca.crt"]
  token_reviewer_jwt     = data.kubernetes_secret_v1.vault_auth_sa.data["token"]
  issuer                 = "api"
  disable_iss_validation = "true"
}
���👉 Configure Vault Kubernetes Role
Just as you know, using vault, accessing resources are configured using vault policies and vault roles, now you will be configuring the vault policy that gives access to the vault snapshot resources.
create a file named vault-backup-restore.hcl and save the below code into the file.
path "sys/storage/raft/snapshot" {
  capabilities = ["read", "create", "update"]
}

path "sys/storage/raft/snapshot-force" {
  capabilities = ["read", "create", "update"]
}
Now, you can create the vault policy and vault role, the vault policy will be attached to the created vault role.
// Create a Vault policy

resource "vault_policy" "snapshot" {
  depends_on = [vault_kubernetes_auth_backend_config.config]
  name       = "vault-snapshot"
  policy     = file("./vault-backup-restore.hcl")
}

// Create a Vault policy and attach policy created above

resource "vault_kubernetes_auth_backend_role" "snapshot-role" {
  backend                          = "kubernetes"
  role_name                        = "vault-backup"
  bound_service_account_names      = [kubernetes_service_account_v1.this.metadata.0.name]
  bound_service_account_namespaces = ["vault"] # Allow for all namespaces, try to use specific namespace here
  token_ttl                        = 43200     //1 day
  token_policies                   = [vault_policy.snapshot.name]
}
Creating the cronJob and job to backup and restore Vault
It's time to test out what you have been configuring so far, the reason for going through the long route of the above configurations is to avoid using plain text vault tokens and AWS credentials to authenticate just for the backing up and restoration of vault snapshots.
👉 creation and backing up of vault snapshot
The below deployment is the cronjob that continuously creates your vault snapshot and backs it up to your AWS s3 bucket.
you can adjust the schedule value to what timing works for you.
you also need to replace S3 BUCKET NAME with your s3 bucket name, and you might not need the env variables of VAULT_CACERT, VAULT_TLSCERT and VAULT_TLSKEY if you don't have tls enabled in your existing vault setup.
apiVersion: batch/v1
kind: CronJob
metadata:
  name: vault-snapshot-cronjob
  namespace: vault
spec:
  schedule: "* * * * *"
  jobTemplate:
    spec:
     template:
        spec:
          serviceAccountName: vault-snapshotter
          volumes:
            - name: tls
              secret:
                secretName: vault-tls
            - name: share
              emptyDir: {}
          containers:
          - name: backup
            image: vault:1.12.1
            imagePullPolicy: IfNotPresent
            env:
            - name: VAULT_ADDR
              value: https://vault-active.vault.svc.cluster.local:8200
            - name: VAULT_CACERT
              value: /vault/tls/vault.ca
            - name: VAULT_TLSCERT
              value: /vault/tls/vault.crt
            - name: VAULT_TLSKEY
              value: /vault/tls/vault.key
            command: ["/bin/sh", "-c"]
            args:
              - >
                SA_TOKEN=$(cat /var/run/secrets/kubernetes.io/serviceaccount/token);
                export VAULT_TOKEN=$(vault write -field=token auth/kubernetes/login jwt=$SA_TOKEN role=vault-backup);
                vault operator raft snapshot save /share/vault-raft.snap;
            volumeMounts:
              - name: tls
                mountPath: "/vault/tls"
                readOnly: true
              - name: share
                mountPath: "/share"
          - name: snapshotupload
            image: amazon/AWS-cli:2.11.21
            imagePullPolicy: IfNotPresent
            command:
            - /bin/sh
            args:
            - -ec
            - |
                until [ -f /share/vault-raft.snap ]; do sleep 5; done;
                AWS s3 cp /share/vault-raft.snap s3://S3 BUCKET NAME/vault_raft_$(date +"%Y%m%d_%H%M%S").snap;
            volumeMounts:
            - mountPath: /share
              name: share
          restartPolicy: OnFailure
then you can deploy using kubectl apply -f vault-backup.yaml or deploy using terraform by adding the following to your existing terraform config.
data "kubectl_file_documents" "cronjob-vault" {
  content = file("./vault-backup.yaml")
}

resource "kubectl_manifest" "cronjob-vault" {
  depends_on = [vault_kubernetes_auth_backend_role.snapshot-role]
  for_each  = data.kubectl_file_documents.cronjob-vault.manifests
  yaml_body = each.value
}
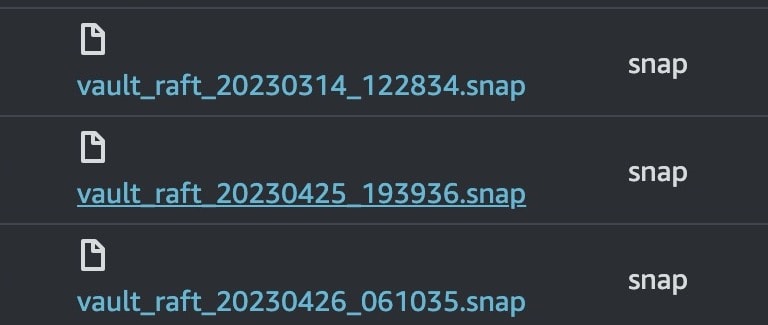
if everything goes well, you should have something like this in your AWS s3 bucket.
👉 pulling backup and restoration of vault snapshot
if the situation arises and you need to restore your backup due to cluster migration or unforeseen disaster, this deployment is what you will use for restoration.
but when a cron job is successful, it would be left hanging around right, this has been eliminated using ttlSecondsAfterFinished: 1800 value, so after 1800 seconds, the job disappears, you can always adjust it to whatever seconds you believe your restoration will take to be successful.
apiVersion: batch/v1
kind: Job
metadata:
  name: vault-restore-cronjob
  namespace: vault
spec:
  ttlSecondsAfterFinished: 1800
  template:
    spec:
          serviceAccountName: vault-snapshotter
          volumes:
            - name: tls
              secret:
                secretName: vault-tls
            - name: top
              emptyDir: {}
          containers:
          - name: pullvaultbackup
            image: amazon/AWS-cli:2.11.21
            imagePullPolicy: IfNotPresent
            volumeMounts:
            - name: top
              mountPath: /top
            command:
            - /bin/sh
            args:
            - -ec
            - |
                last_file=$(AWS s3 ls s3://S3 BUCKET NAME/ | awk '{print $NF}' | tail -n1);
                AWS s3 cp s3://S3 BUCKET NAME/${last_file} /top/vault-raft.snap;
          - name: restore
            image: vault:1.12.1
            imagePullPolicy: IfNotPresent
            volumeMounts:
            - name: top
              mountPath: /top
            - name: tls
              mountPath: "/vault/tls"
              readOnly: true
            env:
            - name: VAULT_ADDR
              value: https://vault-active.vault.svc.cluster.local:8200
            - name: VAULT_CACERT
              value: /vault/tls/vault.ca
            - name: VAULT_TLSCERT
              value: /vault/tls/vault.crt
            - name: VAULT_TLSKEY
              value: /vault/tls/vault.key
            command:
            - /bin/sh
            args:
            - -ec
            - |
                SA_TOKEN=$(cat /var/run/secrets/kubernetes.io/serviceaccount/token);
                export VAULT_TOKEN=$(vault write -field=token auth/kubernetes/login jwt=$SA_TOKEN role=vault-backup);
                until [ -f /top/vault-raft.snap ]; do sleep 5; done;
                cd /top/
                vault operator raft snapshot restore -force vault-raft.snap;
          restartPolicy: Never
you can deploy the restoration job using kubectl apply -f vault-restore.yaml or using the following terraform code
data "kubectl_file_documents" "job-restore-vault" {
  content = file("./vault-restore.yaml")
}

resource "kubectl_manifest" "job-restore-vault" {
  depends_on = [vault_kubernetes_auth_backend_role.snapshot-role]
  for_each  = data.kubectl_file_documents.job-restore-vault.manifests
  yaml_body = each.value
}
When you have tls set up for your vault already, you will need to mount it also in the cronjob and job deployment to avoid errors relating to tls which would cause the deployment to fail.
I hope you've learned something useful from this blog to take home for Kubernetes secret management with hashicorp vault oss reliability and damage control.
Till next time 🤞🏽
References
- https://michaellin.me/backup-vault-with-raft-storage-on-kubernetes/
- https://verifa.io/blog/how-to-automate-hashicorp-vault-oss-backups-in-AWS-eks/index.html