Good Secrets Management in Kubernetes
You probably handling your manifest and deployment secrets in kube like this
apiVersion: apps/v1
kind: Deployment
metadata:
  creationTimestamp: null
  labels:
    app: hashicorp-vault-k8s
  name: hashicorp-vault-k8s
spec:
  replicas: 1
  selector:
    matchLabels:
      app: hashicorp-vault-k8s
  template:
    metadata:
      creationTimestamp: null
      labels:
        app: hashicorp-vault-k8s
    spec:
      containers:
      - image: busybox
        name:
        env:
        - name: API_KEY
          value: jduhdshieioieiisbbjsb
        - name: AWS_KEY
          value: 96859988gddjjdjds
        - name: WEBHOOK_SECRET
          value: jimjimjimokaynice
you are adding the secrets using environment variables, and if you are not doing it this way, you probably mounting it as a file path or injecting it as a file.
regardless of the ways you are getting secrets to your pods, none of the process is recommended security wise, because secrets are not encrypted on rest, in memory or etcd.
injected secrets in the containers are in plaintext or base64, and you might also end up committing the yaml file to github as your Source Of Truth that if you plan to do GitOps.
and if something goes wrong either at org level or via third party access on your github repo, these secrets become available to attackers in plaintext.
So lets get into fixing this, time to jump in;
My Environment set up?
- AWS EKS Cluster(Fargate) — Here is terraform codes
- Local Installations are helm, kubectl and Vault for CLI
What will i be doing ?
- Spun up a running Vault on Kubernetes
- Kubernetes Auth Method
- Create and use Vault KV secrets engine
- Vault Policies and Service Accounts creations
- Injection of created secrets in kv into our deployment/pod yaml file
Vault Installation
Before installing the vault, you need to create a namespace called vault in your kube cluster
kubectl create ns vault
after that, you can install vault using helm install, installing it this way means you are following the default configurations and there is requirement for a PVC in other to create a "file" backend as data storage for vault.
helm install vault hashicorp/vault --namespace vault
Although this process is not recommend in production, due to absent of High Availailty, you might consider Consul as your backend for data storage in prod.
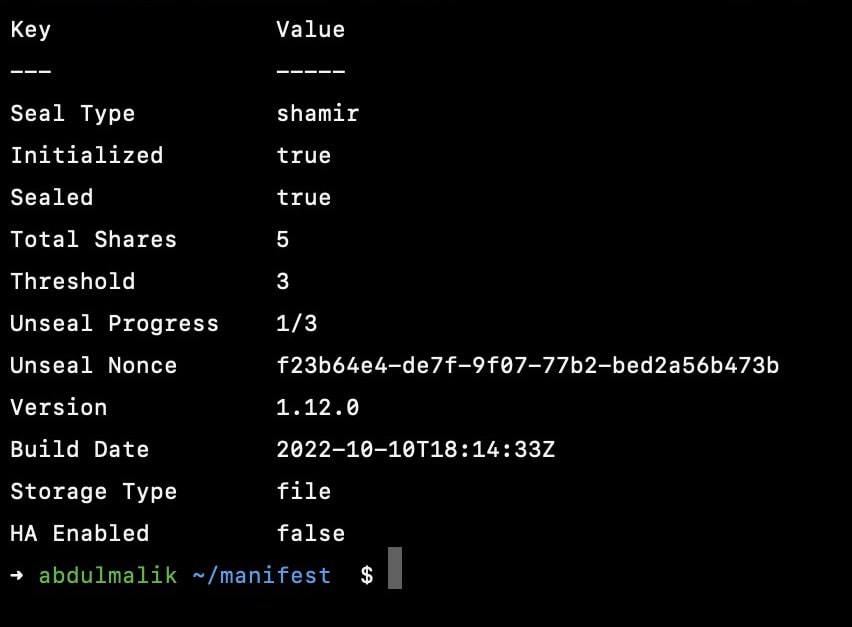
Done with the installation, noticed the vault-0 pods is yet to be ready, thats because the vault hasnt been unsealed, so lets get it up

Initialize and unseal vault
so run
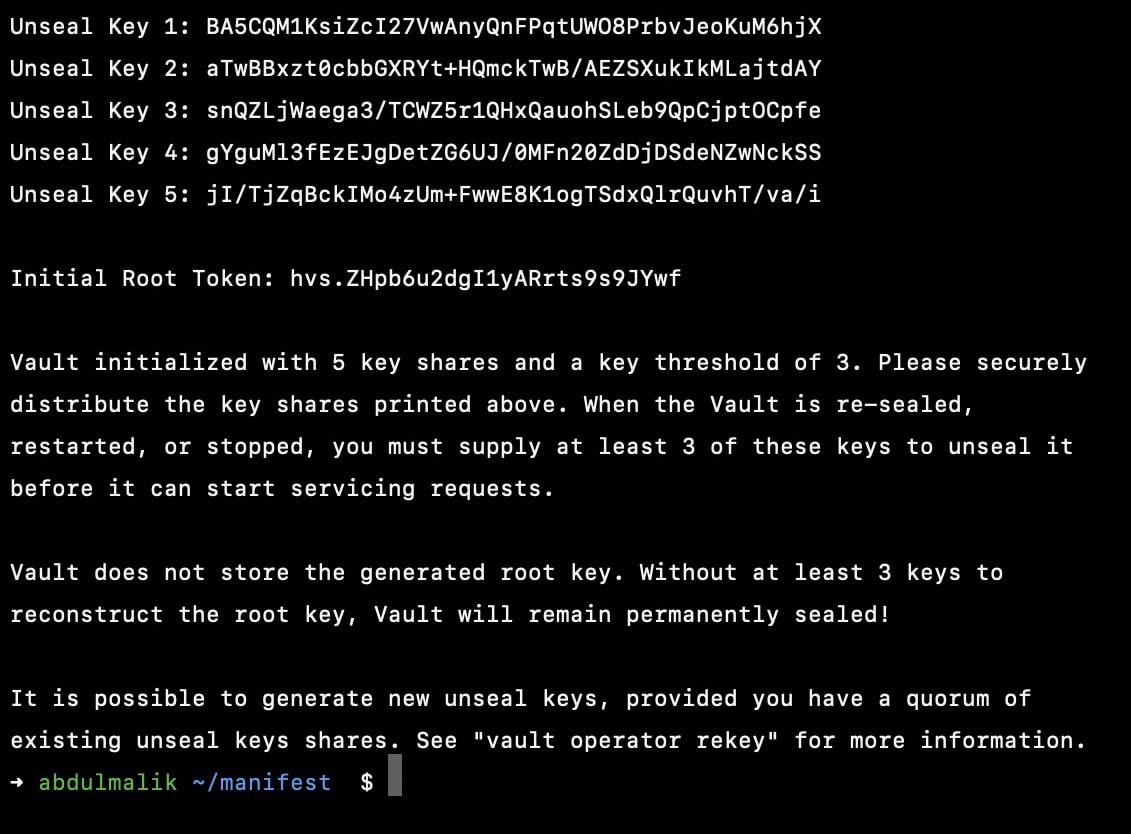
kubectl exec -it vault-vault-0 -n vault -- vault operator init

Now you need to unseal atleast 3 key to get it up running
kubectl exec -it vault-vault-0  -n vault -- vault operator unseal KEY1
kubectl exec -it vault-vault-0  -n vault -- vault operator unseal KEY2
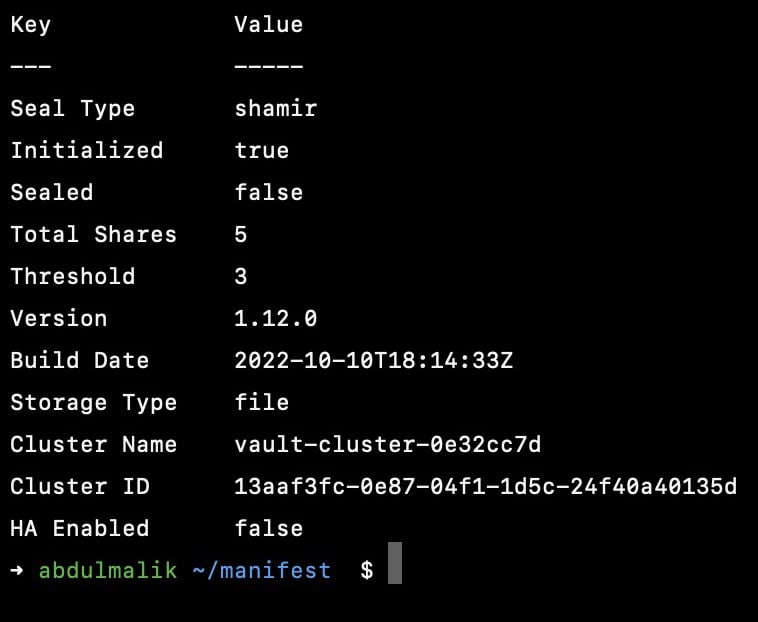
kubectl exec -it vault-vault-0  -n vault -- vault operator unseal KEY3
Also make sure you copy both the root token and the sealed keys into seperate note cause you might need to login via root token later or probably unsealling again.
because if you cant unseal your vault, it means you've lost access to your vault and the data, hence you will be creating a new vault

unsealed one key

unsealed three keys
Also there are ways to auto unseal, but thats a topic for another day.
Done initializing and unsealing? now login into your vault using the root token you copied earlier
kubectl exec -it vault-vault-0 -n vault -- vault login

Kubernetes Auth Method
This stage is where you configure authentication between the kube cluster and vault server, so enable auth for kubernetes by running this
vault auth enable kubernetes
now write the configurration into the config path of the auth engine you just created
vault write auth/kubernetes/config \
token_reviewer_jwt="$(cat /var/run/secrets/kubernetes.io/serviceaccount/token)" \
kubernetes_host=https://${KUBERNETES_PORT_443_TCP_ADDR}:443 \
kubernetes_ca_cert=@/var/run/secrets/kubernetes.io/serviceaccount/ca.crt \
issuer="https://kubernetes.default.svc.cluster.local"
In addition to this, you can configure all this on the UI side too by running
kubectl port-forward svc/vault-vault -n vault 443:8200
Create and use Vault KV secrets engine
vault kv secrets engine is used to store static secrets, writing a key/value pairs to the vault which should be a non-string values
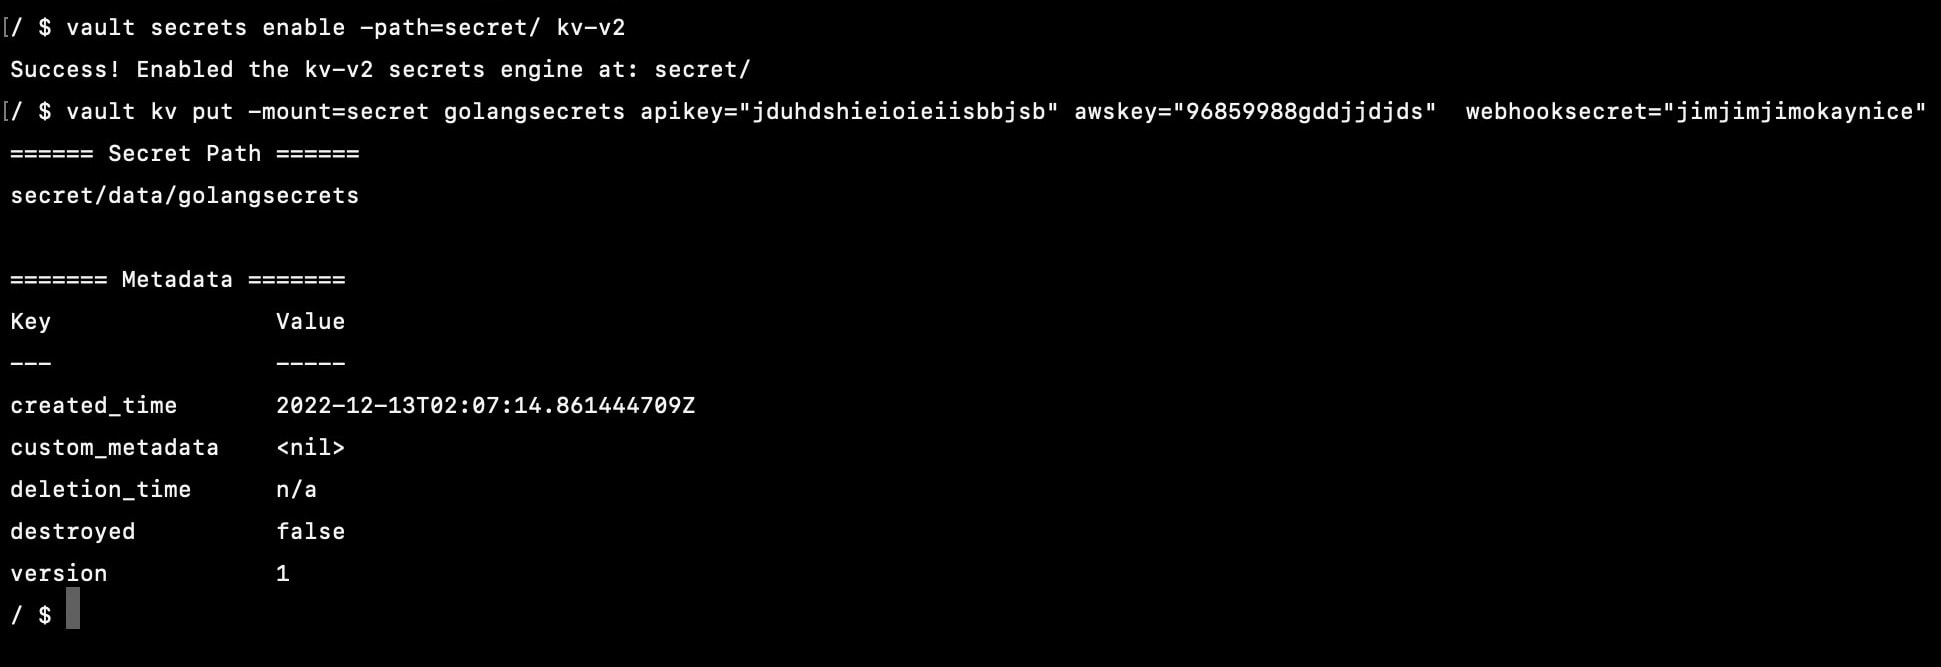
so enable the kv secrets engine by running this in your vault
vault secrets enable -path=secret/ kv-v2

OR

vault secrets enable -version=2 -path=secret/ kv
So now that you have enabled the kv secret engine, lets start creating secrets in different file paths
vault kv put -mount=secret golangsecrets apikey="jduhdshieioieiisbbjsb" awskey="96859988gddjjdjds" webhooksecret="jimjimjimokaynice"

So now you've created kube auth, you can also enable kv secrets at the same time.
I have added our secret to golangsecrets file, it is acessible on the path secret/data/golangsecrets.
Now let's move to the part where you can make vault and pods to communicate with each other via roles, service account and policies.
Create custom service account
While the humans use kubeconfig to authenticate with the cluster, pods use serviceaccounts to authenticate.
And i believe you know your pods has a default service account, but this default service accounts does not have any permission, so its not useful.
Now you need to create a custom service account for your pod which will be binded to the vault authentication roles you will be creating alongside the vault policies that carries the permission that the role can access.
apiVersion: v1
kind: ServiceAccount
metadata:
    name: hashicorp-vault-k8s-pod
    labels:
        app: hashicorp-vault-k8s-pod
Creating vault policies
You need to create a policies that defines what access a vault role has on a certain secret path, whether its just a read permission or the role can perform more actions such as delete, update and more, you can also read up more about vault policies here.
But in this guide i only needa read access so i will be creating the hcl file that holds the rules
cat <<EOF> /home/vault/hashicorp-vault-k8s.hcl
path "/secret/data/golangsecrets" {
    capabilities = ["read"]
  }
EOF
now you create the policy by running
vault policy write hashi-vault-k8s-policy /home/vault/hashicorp-vault-k8s.hcl

Creating vault roles for k8s access
You need to create a vault role under the k8s auth you've configured earlier, this role is what you will bind the serviceaccount and policies too.
vault write auth/kubernetes/role/hashi-vault-k8s-role \
    bound_service_account_names=hashicorp-vault-k8s-pod \
    bound_service_account_namespaces=vault \
    policies=demo-hashi-vault-k8s-policy \
    ttl=24h
So now that you've created the role and you've also binded the serviceaccount and policy you created earlier.
It's time to move to the next part, injecting secret into our pods.
But before that, i would like to inform you that you can use a single role and bind more than just one service account to it, likewise the namespaces too.
Injection of created secrets in kv into our deployment/pod yaml file
With the serviceaccount you created earlier, it's time to use it in your pods now by adding it to your deployment yaml
apiVersion: apps/v1
kind: Deployment
metadata:
  creationTimestamp: null
  labels:
    app: hashicorp-vault-k8s
  name: hashicorp-vault-k8s
spec:
  replicas: 1
  selector:
    matchLabels:
      app: hashicorp-vault-k8s
  template:
    metadata:
      creationTimestamp: null
      labels:
        app: hashicorp-vault-k8s
    spec:
      serviceAccountName: hashicorp-vault-k8s-pod //add the serviceacccount to your pods
      containers:
      - image: busybox
        name: hashicorp-vault-container
        command:
          ['sh', '-c']
        args:
          ['source /vault/secrets/golangsecrets']

---
apiVersion: v1
kind: ServiceAccount
metadata:
    name: hashicorp-vault-k8s-pod
    labels:
        app: hashicorp-vault-k8s-pod
Now you need to inject the vault agent injector by addding the followwing annotation to your yaml file
      annotations:
        vault.hashicorp.com/agent-inject: 'true'
        vault.hashicorp.com/agent-inject-secret-golangsecrets: secret/golangsecrets //my secret file path
        vault.hashicorp.com/agent-inject-template-golangsecrets: |
          {{ with secret "secret/data/golangsecrets -}}
            export API_KEY="{{ .Data.data.apikey }}"
            export AWS_KEY="{{ .Data.data.awskey }}"
            export WEBHOOK_SECRET="{{ .Data.data.webhooksecret }}"
          {{- end }}
        vault.hashicorp.com/role: hashi-vault-k8s-role //the vault role you created earlier
        vault.hashicorp.com/tls-skip-verify: 'true'
the reason i am also injecting it as template vault.hashicorp.com/agent-inject-template is because i want to export it and use it as an enviroment variables
also the vault.hashicorp.com/tls-skip-verify: 'true' is not recommended in prod, decided to skip it since i didnt set any tls cert for an end to end communication yet.
your final deployment yaml file should look like this
apiVersion: apps/v1
kind: Deployment
metadata:
  creationTimestamp: null
  labels:
    app: hashicorp-vault-k8s
  name: hashicorp-vault-k8s
spec:
  replicas: 1
  selector:
    matchLabels:
      app: hashicorp-vault-k8s
  template:
    metadata:
      annotations:
        vault.hashicorp.com/agent-inject: 'true'
        vault.hashicorp.com/agent-inject-secret-golangsecrets: secret/golangsecrets //my secret file path
        vault.hashicorp.com/agent-inject-template-golangsecrets: |
          {{ with secret "secret/data/golangsecrets -}}
            export API_KEY="{{ .Data.data.apikey }}"
            export AWS_KEY="{{ .Data.data.awskey }}"
            export WEBHOOK_SECRET="{{ .Data.data.webhooksecret }}"
          {{- end }}
        vault.hashicorp.com/role: hashi-vault-k8s-role //the vault role you created earlier
        vault.hashicorp.com/tls-skip-verify: 'true'
      creationTimestamp: null
      labels:
        app: hashicorp-vault-k8s
    spec:
      serviceAccountName: hashicorp-vault-k8s-pod //add the serviceacccount to your pods
      containers:
      - image: busybox
        name: hashicorp-vault-container
        command:
          ['sh', '-c']
        args:
          ['source /vault/secrets/golangsecrets']

---
apiVersion: v1
kind: ServiceAccount
metadata:
    name: hashicorp-vault-k8s-pod
    labels:
        app: hashicorp-vault-k8s-pod
So after applying the yaml file using kubectl apply =f deployu.yaml, you can confirm if the secrets are successful mounted by navigating into /vault/secrets/ in your pods.

But in situations where you pods refuse to start, most of the time its caused by an error with the vault agen injector, you can debug it using kubectl exec -it podsname -n vault -- sh -c vault-agent-init
You can also read about automating HashiCorp Vault backup and restoration for kubernetes and setting up of end to end tls for vault with High Availability.
That's it folks! I hope you find this useful and helpful.
